Thursday, March 31, 2011

Alternator Upgrade

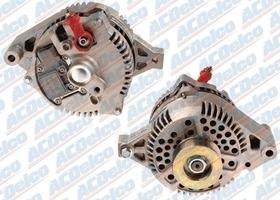
After much research on the topic of OEM Mustang alternators, I decided to find a suitable upgrade to replace the original 45 amp unit. I trolled the internet and came across multiple forums that discussed the subject and after reading THIS forum thread I decided to go with a 1990's ford 3G alternator. The one I bought on ebay today was a rebuild from a 1992 Lincoln Continental. I believe it is te 150 Amp version (as opposed to the high output 200 Amp version.) I searched for Ford Taurus alternator's as fist since I read a lot about people using those for their Mustangs and Broncos, but the one for the Lincoln Continental was cheaper.


The alternator is internally regulated and will come with the clip that plugs into the back which will allow me to splice it into my wiring harness. To purchase one from Autozone or even Kragen/O'Riley, it would have cost at leats $150. I purchased a rebuilt version on Ebay for $69.00 including shipping. The alternator won't ship until Tuesday or Wednesday, but I'm in no particular rush to get it either.

A guy in Indio said that I could have his 1966 Mustang power steering mount so I'm just waiting on him to let me know when I can pick it up. I've seen most of those on Ebay for around $200 used. This would be a big win for me if I can pick it up. I may pick up a water pump and drive belts this weekend since I'll be working on the car on Saturday while Lauren is working.


I also purchased a 1967-70 Mustang battery tray which I'll need the top half of to weld to my existing '66 battery tray to allow for room to install a 24" wide radiator from a 1969 Mustang. The one I'm looking to get is aluminum and with shipping will cost around $250, but it'll be worth not overheating in this desert climate. that part is still yet to come, but it's on my list of things to get in the near future along with the gas tank kit for a 1970 Mustang (22 gallon.)


UPDATE 04-16-11

The Alternator is now installed. I un-bolted the back of the case and rotated it so that the wires came out of the bottom instead of the top.

Wednesday, March 30, 2011

Starter On Its Way


I ordered a high-torque mini starter for the 'Stang and expect that it will arrive sometime at the end of the week or the beginning of next week. I still have a little more to spend so I may buy a water pump and the spark plug wires as well as a few other things. I'd like to put a high output alternator on the car, but I may have to hold off on that for a few years. 

Product Description :

Applications:
Brand New Mini Racing High Torque Starter for Fords

(1992-96) Ford Bronco 4.9L, 5.0L, 5.8L w/ AT
(1992-2002) Ford E Series 4.2L, 4.9L, 5.0L, 5.8L
(1992-98) Ford F Series 4.2L, 4.9L, 5.0L, 5.8L
(1990-91) Ford LTD Crown Victoria, Mercury Grand Marquis 5.0L
(1994-2004 Ford Mustang 3.8L
(1992-95) Ford Mustang 5.0L
(1990-97) Ford Thunderbird 3.8L, 5.0L
(1990-92) Lincoln Mark VII 5.0L
(1990) Lincoln Town Car 5.0L
(1989-97) Mercury Cougar 3.8L, 5.0L

Also can be used on these older models:

1965-68 Ford Mustangs  289 CID
(1982-91) Ford Mustangs 5.0L (302 CID) w/ AT
(1968-79) Ford Mustangs 5.0L (302 CID) w/ AT
(1969-73) Ford Mustangs 5.8L (351 CID) w/ AT

YOUR VEHICLE IS 1991 OR OLDER WE INCLUDE FOR FREE THE WIRING HARNESS ADAPTER KIT WITH INSTRUCTIONS

This starter will replace older 4 inch and 4-1/2 inch 9 tooth bendix gear starters also providing a 50% weight reduction and requiring less cranking amps while cranking with twice the torque!

The PMGR (Permanent Magnet Gear Reduction) Type  starter is a smaller size, it provides better header clearance and reduces the effects of a hot start.


Starter Family:    Ford PMGR
Type:    PMGR
Voltage:    12 Volts
Rotation:    CW
Teeth/Splines:    10 Teeth/Splines
Pinion/Splines OD:    27.7mm / 1.091in
DE Housing Number:    371-14035
Mounting Hole 1:    10.0mm ID Unthreaded
Mounting Hole 2:    11.0mm ID Unthreaded
New or Re-manufactured:    New
Approximate Weight:    8.405 lbs / 3.82 kg 


UPDATE: The starter was delivered on Monday April 4th and included the wires for the adaptation into an older car. I didn't buy spark plug wires, I did buy a high output alternator, mounting brackets, an aluminum water pump and a 1969 mustang battery tray to fit a 24" radiator. It was installed in my entry on 04/16/2011


Sunday, March 20, 2011

Header Bolt-Up


After teaching at Pipeline this morning I went over to my parents house to work on the Mustang since Lauren was at work. I started with a cup of coffee and a jalapeno and cheese bagel and some chit-chat with my parents before heading outside to get started on the car.


Mr. Gasket header gaskets and bolts
My dad recently purchased some parts for his 351-Cleveland motor and while he was at it he bought the necessary header gaskets and bolts for my dinky 302. I had already found eight header bolts in the garage and the guy that was selling the new bolts had an opened set of twelve that was missing two. It worked out perfectly for me since the guy sold my dad the bolts for $2. The gaskets were $17.95 (typical for header gaskets for a 302.)


Driver's side header top view
You can see that these shorty Headman headers barely fit inside the small 1966 Mustang engine compartment. This side was a bit of a hassle to squeeze in but it ultimately fit.


Passenger's side header from under car
The passenger's side has all kinds of room for the header without the steering column, power steering rack clutch cable, etc. in the way. I'm sure it will be pretty easy for the exhaust shop to fit the 2.5" tubing on this side when that day comes.


Driver's side header from under car
The driver's side of the car has a slightly different story. The collector of the header is about 4" away from the clutch cable ear on the bell housing and it looks pretty darn close to being in line with it as well. It's hard to say at this point but my guess is that the exhaust shop will be able to fit the exhaust piping with little effort. My only other concern is that the tubing will run right by the power steering cylinder with its rubber sleeve. I'm not sure that it will be a problem, but it's worth looking into once the exhaust is installed.


Coil mounted and hooked up to Pro Comp distributor
The final thing I wanted to do before heading home was to find a place to install the coil since the front right side of the motor was going to be out of the question with the power steering pump going there. Although it was a tight fit, I finally found a spot on the intake manifold after using a 1" spacer to move it up off of the manifold a little. As you can see it is almost touching the driver's side valve cover, but it fit nicely. I used open u-shaped connectors for the distributor wires (red for the hot and blue for the ground since I didn't have black.)

I should have some money to buy additional parts soon as I will be working nine hours of OT for the spring NABT hosted in Santa Monica on Saturday. I should also be getting a bonus check for 2010 sometime in the next couple of weeks. My goal is to use said monies to get the motor running (starter, spark plug wires, water pump, alternator, radiator, etc.) How many parts I am able to purchase will largely depend on the amount of my bonus check.
Saturday, March 5, 2011

Motor Maddness

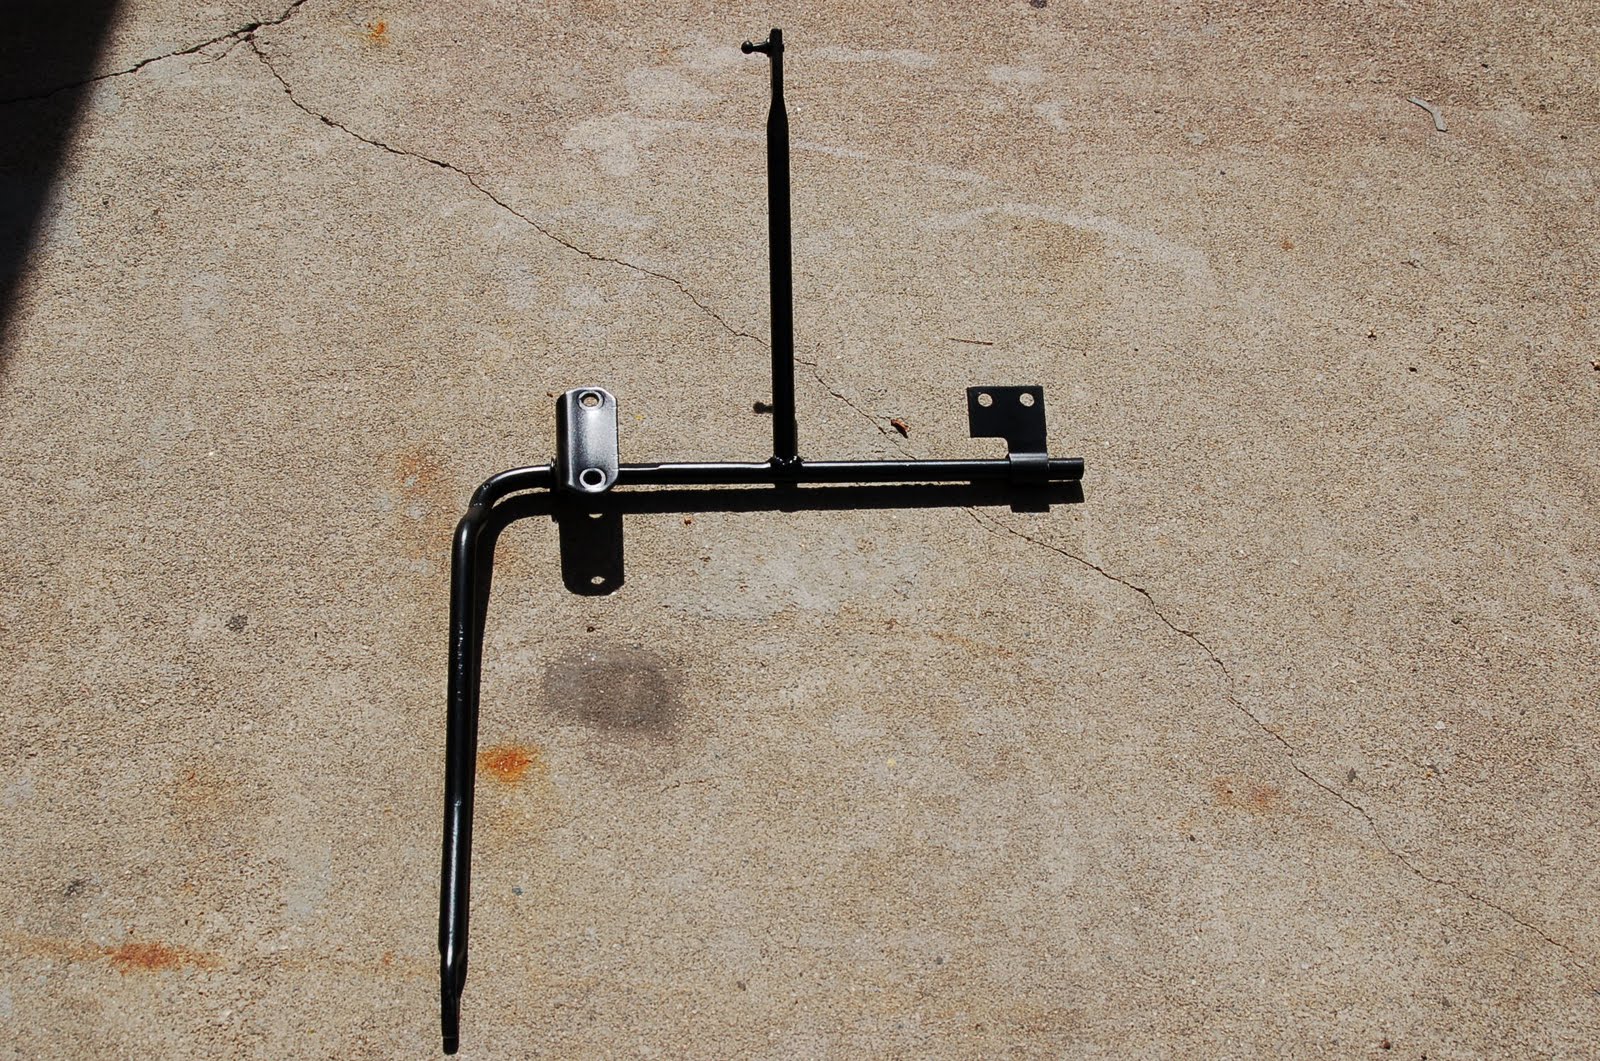
Original 6-cylinder accelerator linkage
Today Lauren had to work today which gave me the perfect opportunity to work on the Mustang before going to dinner at Benihana's and then to my men's softball game at the Grove. I started off the day with a plan to modify the accelerator linkage which was previously used for the straight six. It was designed to pull the arm on the 1-barrel carburetor DOWN on the left side of the motor while the V8 linkage is designed to pull the arm on a 2 or 4-barrel carburetor BACK on the top of the motor. It's quite a different setup and I wasn't about to spend $50 for a new linkage when I am fully capable of modifying my existing one.


Modified linkage for a V-8
I started by cutting the stock linkage where it started to bend forward to go alongside the straight six (but was now running into the middle of the V8 motor.) I then mounted the linkage and found out at which point I needed to cut the top half of the stock linkage to remove the bend and also allow it's height to meet the carburetor throttle. Once marking it and cutting it, I had to bevel out the end that was going to be welded onto the linkage so that I wasn't welding a flat surface to a rounded surface. You can think of it like the difference between trying to pick up a drinking glass with your hand straight and flat versus cupping your hand to fit the shape of the glass. I used a grinder to grind down the center of the top half just enough to fit about 1/2 way down onto the bottom half.


The gas pedal reinstalled with modified linkage
Locating the correct spot to weld the linkage together was tricky because moving the weld a couple of centimeters at the base changed the location at the top by inches which changed the location the gas pedal inside the car (by making it either too high or too low.) On the fourth spot weld, we had found the right spot. Now the gas pedal sits right where it should and when it is about two inches off the floor, the carburetor is at full throttle. I had to leave a couple of inches due to sound deadening, carpet and a floor mat that will eventually be installed.


From a backside view, you can see the Holly stamp on the rebuilt carburetor and in the bottom left corner you can see the Holly fuel pump that I bought from the guy that sold me the clutch, pressure plate and flywheel in San Juan Capistrano. The linkage that is attached to the carburetor was found by my dad in the garage after looking though trays of nuts, bolts an other parts. It was bent up and had chipping paint, but I was able to straighten it out and clean it up. It is adjustable which could prove useful once the carpet is installed. You'll notice the water temperature sending unit on the back of the motor (right side of picture) which had previously been located near the distributor, but was now in the way and had to be moved to the back of the block. I filled the hole with the plug that was in the back of the motor.


From a front view you can see the new distributor installed that my dad bought a few weeks back. We hooked up the vacuum line to the carburetor, but haven't yet hooked up the coil. since we don't quite know where it will be able to mount without the power steering pump installed. My dad pulled a set of rubber valve cover gaskets and installed those as well.


Here is a top-down view of the motor where you can see we still need to install the alternator, power steering pump, water pump, pulleys, headers, radiator and spark plug wires. Of course there are still other things that need to be installed such as the starter, gas tank, battery, air filter and fuel lines from the tank to the pump to the carburetor, but we'll get there when we get there.


Modified Linkage painted and installed

Saturday, February 26, 2011

Keeping the Chrome

With money going out faster than it's coming in, I'm reduced to doing what I can with the Mustang that doesn't require additional money. I stopped by my parents house on my way to the spring co-ed opening softball game at the Grove. I grabbed a few parts to bring home and polish in hopes that they would turn out good enough to use so that I could save some money having to buy new parts.


Polished reproduction Gas Cap
I thought that the above gas cap was the original, but after looking on the back and seeing a stamp that says "this is a reproduction part by Pro Products USA" I realized that I was simply polishing a replacement part. I wanted to buy the 1965 gas cap, but this one turned out so nice that I'm going to have to just keep it and save the $50 that a new one would have cost.


passenger and driver window cranks
Before I'm done I'm going to need a total of four window cranks although I was only able to find two the other day. One of the above cranks is actually a reproduction and the other is an original although they look pretty similar in wear. If I can find the two missing ones and they are able to polish up to look close to the ones above, I will be saving $40.


driver and  passenger interior door handles
Both of the interior door handles that I found are both originals and actually cleaned up quite nicely. Interior door handles run about $20 a pair plus tax.


polished deluxe steering wheel
The steering wheel above appears to be a genuine Shelby GT350 steering wheel. I believe that it belonged to Calvin and has been sitting on the garage shelf for years now. When I found it, it was covered in rust and gunk. I brought it home and took it apart in order to give it a good polish and even found some genuine ford part numbers on the middle horn ring where it says "GT.350." I believe one of the part numbers is "C60A-3655-A". On the steering wheel itself the part number is "C5ZA-13A800-D". I'll need to buy an epoxy putty kit in order to fix the gap on the left side, but once I do that the steering wheel will be ready to put into the car. The steering wheel that I was going to buy was $175 and you know what they say...$175 saved is $175 earned.


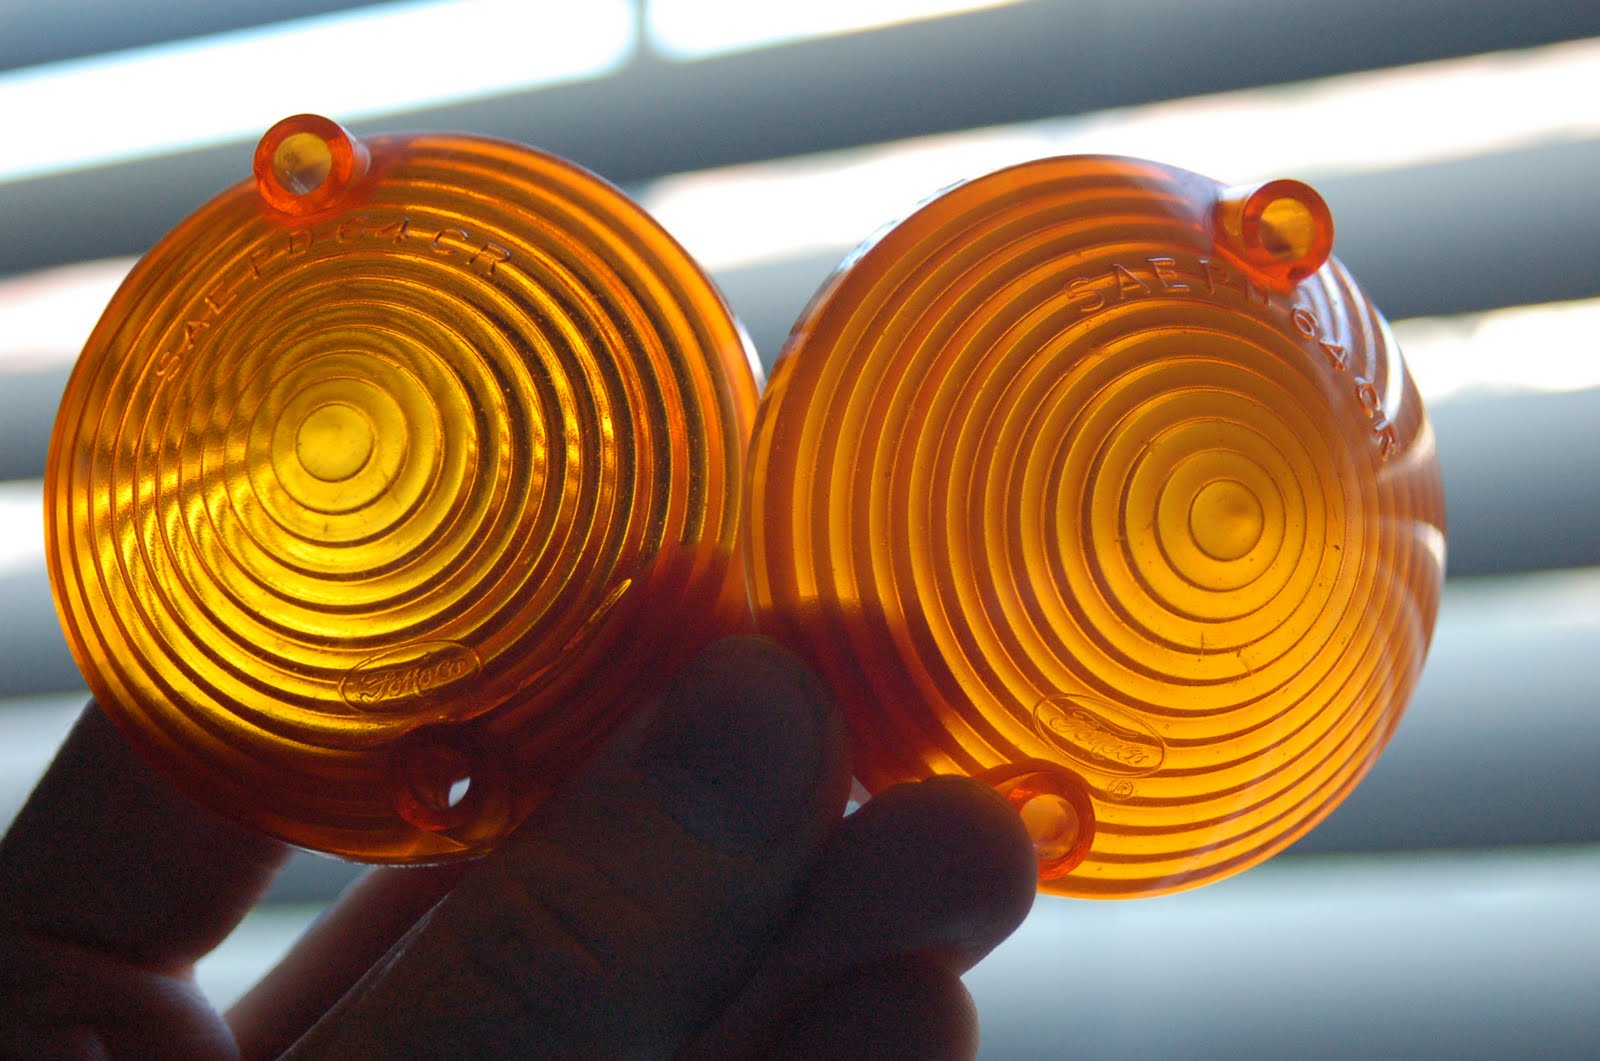
cleaned original blinker lenses
I know that the blinker lenses are probably around $5 for both, but since I had two good ones that were able to polish up nicely, I went ahead and spent ten minutes cleaning them so that I can reuse them. Something to note on these originals have the "FOMOCO" stamp on the bottom whereas the re-manufactured ones wouldn't.


cleaned/polished brake lenses/bezels
I also cleaned the brake light bezels using the chrome polish and then cleaned the brake light lenses using Plastic-X polish. I must say that the lenses turned out pretty darn nice. I'll probably re-paint the middle of the bezels with some black semi-glass paint to get them back to original. Notice the "FOMOCO" stamp on the bottom middle of the lenses.


polished heater control plate

This is the heater switch place with levers. I pulled most of it apart in order to clean each lever and then used some white lithium grease to make sure that the movement of the levers are smooth. I also found a brand new set of heater cables in the garage for a 64-66 Mustang which must have originally been purchased for Gary's Mustang back in 2000. I switched my old, tired cables for a fresh new set which moved effortlessly.


Polished exterior driver and passenger door handle
After looking through a few different exterior handles, I found these two which cleaned up quite nicely and will work perfectly for my restoration project.


polished dash lighter
I cleaned the wiper switch bezel as well as the headlight switch bezel, but have only included a picture of the lighter which I just recently cleaned after finding it in a box of old Mustang parts. The one that came with my car was an aftermarket plastic one...quite ugly. This one looks much better!

Sunday, February 13, 2011

Rear Window


I brought home the original review mirror from the Mustang since it looked like it was salvageable. I had picked up some chrome polish/rust remover while I was at Kragen the other day getting the u-bolts for the driveline. I had 30 minutes to work on a small project so I took on the mirror.


With a little chrome polish and a little elbow grease it looks almost as good as new. There is one small section on the bottom of the mirror that it missing a chunk of chrome, but I think I'm willing to live with that in order to have an original mirror in the car. I might be able to cover it up a little with some silver paint as to not draw too much attention to its imperfection. I think it turned out pretty nice by the time I was done with it:


Saturday, February 12, 2011

My First Mustang

1964 1/2 Mustang in parents driveway on Pinkerton Place in 2003
I bought my first car when I was in eighth grade in 1996 for $400.00. It was a 1964 1/2 mustang that had a 260 backed by a C4 auto transmission. I had found the car in a Press-Enterprise classified ad posted by a guy in his mid thirties with a few toddlers and in need of some cash. He said that he wanted to restore the car, but started having kids and that prevented him from ever starting the project. The car was essentially a shell that needed everything. The top picture is the car closer to the time that I sold it. You'll notice the 3" cowl induction hood, but cannot really see the Shelby style trunk lid and extensions. I recently found a couple of pictures and ass I find more I'll add them to this post.


1964 1/2 Mustang interior in parents driveway on Jerome St in 2000
As you can see, the car had an off-white interior with the door panels and dash painted blue to match the outside of the car. I'm going to paint my current Mustang to look much like this first car that I restored.


1964 1/2 Mustang interior w/ white gauges in parents driveway on Jerome in 2000
Notice the sweeping gauges found in most 1965 Mustangs. My gauges were used to scan in order for my old friend Kyle and his dad to create white faced gauge stickers. As you can see they gave me a set for my car. I just had to use the ghetto pedals from the local import race car store since I was a teenager and didn't know better.


Me cleaning my 1964 1/2 Mustang  in parents driveway on Jerome in 2000
This is when my car was freshly completed and it still had the glasspack exhaust that came out of the back of the car. I later changed it over to 2-chamber Flomasters with cutouts to run open headers when I felt like it.


Foreground- Calvin's 1966 with 6-cylinder
Background- Me cleaning my 1964 1/2 Mustang
Back-Background- DJ Powell's Chevy pickup


In the foreground is my brothers 1966 Mustang that he was in the process of restoring. He drove it around with a straight six for a while before he started taking it apart and converting it to an eight cylinder car (the same thing I'm doing with mine.)


1964 1/2 Mustang interior in parents driveway on Jerome St
This was the car closer to the time that I had first purchased it. I don't think I have any other pictures of the car pre-restoration. For some reason this is the only one I have ever been able to find.