Sunday, July 31, 2011

It Takes a Family to Sand a Car

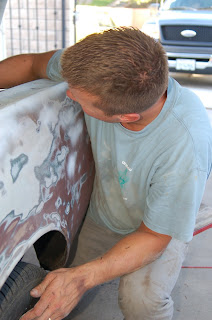
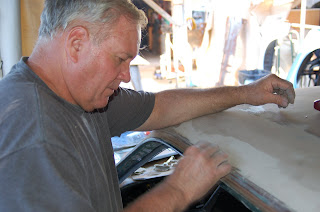
My wife arranged to have her brothers come over and help me work on the car this afternoon to help move things along since I have been fairly busy lately. As a matter of fact I spent Saturday helping friends move and never got the opportunity to work on the car. Today felt like a day of playing catch-up, but with the extra hands on deck, it went quite well. Since my primary goal at this point is to have the car painted by the end of August, I needed all the help I could get to get the car sanded down in preparation for the first coat of primer. Here is a list of my extra hands today:
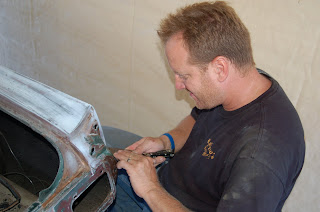

Clint: Brother-in-Law

Brad: Brother-in-Law

Calvin Sr: Dad


Calvin Jr: Brother-by-blood

They each played a role in the sanding that was done today, but there is still more sanding to be done. When I first arrived, I pushed the Mustang under the canopy since there had been thunder storms overnight and into the morning. I used the air compressor to blow off some of the residual rains that were on the car and while I was doing that, the compressor (which has been used for years to paint multiple cars) decided to go up in smoke. My dad took it apart and will take the motor into a shop to have it looked it, but it wasn't going to do us any good today. Without a compressor, we were limited to sanding the old fashioned way with some elbow grease. Fortunately there was plenty of sanding to be done so I put them all to work.

I had Brad and Clint start off with the door jams on both sides of the car. We pulled the strike plates off with an impact screwdriver that my dad picked up from Harbor Freight. My 7-year old nephew took a break from the swimming in the pool to help sand the dash inside the car. 

Brad's side: Passenger

Clint's side: Driver

Once they were finished with the jams all the way around the door, they moved to the trunk where Brad stripped off the old weatherstrip and Clint chipped away cracking filler. I didn't get a shot of the work they were doing, but I did take a shot of the rear which will still need some more sanding.


I spent the bulk of my time working on the cowl. There are so many tiny little bars that need to be sanding so many different ways! It still needs a little more work, but it's mostly done.

1966 Mustang Cowl

I spent the end of the day taking off the layer of gold paint on the passenger's side door, but neglected to take any pictures since it was the end of the day and I was tired. I hope to have my dad and brother work on the car this week. I'm hoping that my dad will strip off the paint on the hood and that my brother will get off the undercoating on the trunk and deck lid. I should have the opportunity to work on the car on the next two Saturday's and the Sunday after that...trying to get it all done.


Sunday, July 24, 2011

Export Brace, Monte Carlo Bar and TT2's test fitted

Today was a day to get a lot of different things accomplished. Lauren had to work, but I still had to help at Pipeline from 10:30-12:45 and then Bethany and Daniel were going to come over for dinner so I knew that I wasn't going to finish everything I wanted to. I started by setting the export brace and monte carlo bar (Scott Drake) in the engine compartment to make sure that they fit. Had the car been in an accident and not been properly repaired, the holes wouldn't have lined up. Fortunately, the front end is in good shape since all of the holes lined up perfectly.

Test Fit of Monte Carlo and Export

Next I wanted to make sure that the 17x8" wide rims I bought were going to fit on my car. The fronts just barely fit without hitting the upper ball join on the control arm. I probably had less than 1/4" of space which I'll definitely need to fit on the tire. Although the rims are considered 8" wide, they are actually a total of 9" wide. Add on an 1/8" of tire hanging off of either side and you have a total of 9.25" of width. Multiple this by 25.4 to find out how many millimeters wide the tire needs to be and you come up with 234.95 or 235. 

Front Pass. 17x8 Rim Space to Ball Joint


The rears seemed to fit like a glove with the 5.5" of backspace. Rolling the quarter panel lips proved to also be a good idea since after the rolled lips I  had about 1/2" of space from the edge of the rim to the inside edge of the rolled lip.I don't want to push my luck so I will put 245. Working the equation backwards it would look like this: 245/25.4= 9.65". Subtract the rim width from 9.65 and that leaves a total of .65" of tire hanging over the rim. Since there are two sides to the rim, only .65/2 or .32" of tire will be hanging over the rim.

Rear Driver's Side Rim Space

Here is the front passenger side of the car with the rim completely mounted to give you an idea of how awesome these rims look:

Torq Thrust 2.1 in 17x8


After I wrapped up at Pipeline I stopped by Kragen and bought two Monroe gas shocks for the front of the car. I needed the shocks in order to mount the shock tower cap which was connected with the same bolts as the export brace. The engine bay looks very dressed up now with the satin finish suspension and it even matches the aluminum radiator.

Export Brace, Monte Carlo bar and Shocks Installed


The shocks I bought just so happened to be a blue that is very close the the spark plug wires so they won't look completely out of place. There still need to be holes drilled on each side of the fender aprons and four holes drilled on the firewall side to accommodate the new export brace since I welded in a piece of sheet metal across the back sometime last year.

New Monroe Shocks Installed

I gave my dad the money to pick up the paint and primer as we hope to have it painted before summer is another distant memory. It is a two stage urethane paint by 4th Dimension. Of course it is Seaside Blue Metallic (Sherwin Williams 32642-G; 4th Dimension) and we also bought some blue pearl to add to the first coat of clear. Below is a picture of the paint next to the pearl.

Seaside Blue Metallic Next to Blue Pearl


Friday, July 22, 2011

Gauges Finished

I received my order from CJ Pony Parts today which included my instrument bezel, new blue gauge light lenses and a Scott Drake export brace and monte carlo bar in a "satin" finish. My gauges have been sitting in the office closet waiting for the final two parts that I received today. If you remember my ENTRY from seven months ago, I pulled the gauges apart, repainted the housing and needles and have been waiting to finish it.

The new lens covers were mounted in the housing to replace the warped and discolored originals. Below you can see the difference between the originals (bottom) and the new lenses (top.)

1966 Mustang Instrument Light Covers (blue)

Once I mounted the new lens covers, I put the gauges back in place as well. From left to right the gauges are Fuel, Oil, Speedometer, Amps, and Temp.


1966 Mustang Gauges

Once I had the gauges back in the housing, I put the spacer cushions in the new bezel which will keep the plastic lens from rattling. I think most people throw those away when they change their bezel because they don't realize that those little pieces of rubbery Styrofoam are actually useful. Next, I placed the metal spacer on top of the housing and  then finally set on the new bezel.

Complete 1966 Mustang Gauges with new Bezel


As mentioned before, I also got in my curved monte Carlo bar and export brace from Scott Drake. I was disappointing with the finish on the monte carlo bar as it is not in perfect condition. I suppose I expected higher quality considering that this was the most expensive monte carlo bar they offered. I purchased the satin finish because I just wanted something different than the standard chrome that everyone else puts on their classic Mustang.


Scott Drake Export Brace & Monte Carlor Bar in Satin Finish

I will get pictures of the rims on the car when I go to my parents house on Sunday afternoon although they'll look weird with an un-painted car and without tires. Here is a quick shot of one of the Torq Thrust 2.1 rims in 17x8 with 5.48" of backspace:


Torq Thrust 2.1 in 17x8


Sunday, July 3, 2011

Shelby/Arning Drop


I've been doing a lot of reading on Vintage-Mustang.com lately and came across a suspension modification that I wish I had learned about when my car was in pieces--The Shelby/Arning Drop. You can read all about the history of how it came about and how it was implemented by Carol Shelby on his Mustangs by going to THIS website, but all you need to know for my blog is that it drops the upper control arms (UCA) down 1" and towards the rear of the car 1/8" on the 65-66 models. Although this lowers the front of the car, its main purpose is to improve handling by raising the "roll center" of the suspension causing the suspension to resist body roll.

I already purchased the 1" front lowering springs and had them installed which meant that I had to pull them back out of the car in order to drop the UCA to drill the new holes. I actually had to make a run down to Auto Zone to pick up a spring compressor that worked from the inside of the spring rather than the outside of the spring due to the limited space between the fender apron and the spring. Once I had the driver spring off I un-bolted the UCA and pivoted it out of the way.

Driver's Side UCA Off

I printed the template for the UCA drop off of the Glazier Nolan website and used that to mark my holes. The template wasn't quite wide enough to line up perfectly with both existing holes although when I measured, I found that the 1" and 1/8" measurements were accurate.
UCA Drop Template
I used a razor blade to cut out holes in the template where the existing bolts where and put a bolt through the template and the fender apron on the side I first punched and then did the same thing on the other side. Once I was done I had my marks to begin drilling. My right hand mark ended up slightly too far to the left, but I compensated for that by widening the hole.

Driver's Side Apron Marked
I started with a very small drill bit and used about five different drill bits before arriving at the last size. I thought my dad would have had a 17/32" drill bit since he has just about every tool you can think of, but alas he didn't so I finished with a 1/2".

Driver's Side Apron with UCA Drop Holes
Once I had the holes finished and the UCA lined up perfectly I slid it back in, bolted it up (without shims since I have a whole new front end and need to have a complete alignment done.) I haven't purchased front shocks yet so you won't see the shocks sitting inside the spring just yet.


The other side went much faster since I knew exactly what I was doing now. I followed the same process and touched up the areas that were drilled or damaged with some flat black paint. I set the springs back in when I was done. I'm hoping to have tires and rims in the next couple of months at which point I should also have the paint on the car done. I can't wait to get the car aligned and see how well it handles with this new suspension upgrade! The last piece that I'll want to put on the front end will be a 1" sway bar for even more responsive handling.

Passenger's Side with UCA Drop Complete


Sunday, June 19, 2011

New Battery


When I went over to my parents house on Father's Day, my dad showed me that he picked up a battery for the Mustang. There's no way I was going to turn down a battery that I didn't have to buy myeslf so I mounted it in the Mustang and will get all the cables hooked up later.


I'm not sure what the brand is, but free is good for me! I should be starting up the car sometime in the near future so this battery will prove very useful. When that day comes, I'm sure I'll have a video to upload.

Sunday, June 12, 2011

Body Work (day 2)


For the second day in a row (on a weekend) Lauren had to work which left me to work on the Mustang. After speaking at Pipeline, I headed over to my parents house, changed and got back to work on the front fenders. As the day before, most of my work was concentrated on the passenger fender since it had the most damage and required the most attention. After making another pass with Bondo on the fender and doing some sanding, I used a can of spray primer to get a good look at the fender. I loosely hung it on the car to get a good look at it and I mist say that it is looking pretty good. There are a couple of spots that I want to spend a little more time on, but overall it is ready for a coat of epoxy primer and block sanding.

Passenger Fender on Mustang

The rear Passenger's side extension had a small dimple dent in it and I attempted to hammer it back out, but I wasn't able to get it entirely out. I used a skim coat of Bondo to bring it flush. I stripped down the paint on the rest of it using a scour pad on an air tool and put a coat of primer on it to check it and it passed the test.

Passenger's Side Rear Quarter Extension

My dad graciously helped me out again today and spent his time working on the roof and the driver's side door area. After sanding down the roof, he used another coat of Bondo for a few low spots.

Roof with Second Coat of Bondo

I have decided to buy a gallon of epoxy primer in order to get a more even finish and a better paint job. Epoxy primer will fill small scratches and level the surface. I haven't decided which brand to go with yet, but that will be my next purchase as we get ready for paint in the upcoming couple of months.

Saturday, June 11, 2011

Body Work

Lauren had work today so I went over to my parents house to do some more body work on the Mustang. The last time I worked on the Mustang I only had a chance to start body work on the front fenders. Today I continued to work on the same fenders. The driver's side fender doesn't appear to have too much damage whereas the passenger's side fender does have more body damage. I spent most of my time today working on the more heavily damaged fender since I want to see it done.
Passenger Front Fender
As you can see from the picture above, I've had to use a few coats of Bondo in order to obtain a smooth finish. I did my best to hammer out the portion of the fender that was crushed in by some previous owner, but wasn't able to get the fender flat. I used a coat of paint to see how close the fender was since it would help reveal low spots or ripples. I found a couple of low spots which is why you see a second coat of Bondo on top of the first coat. The third small coat on the top front of the fender was because there were some low spots that I didn't see before applying the second coat.

Bottom of Front Passenger Fender
If you remember from my previous post about the fenders, there was some rust in the bottom of the panel which I treated and filled with the mig welder. The fender still required a skim coat of Bondo in that area as well as the area where I filled the holes for the mustang emblem. I haven't finished working these areas yet, but will resume that possible tomorrow.

Mustang Roof with Bondo
If you also recall from my previous post regarding body work, the roof had multiple dents from the previous owner (or his ex-wife) that had to be addressed. While I worked on the fenders, my dad took the liberty to help me out. Using a body hammer, he did his best to pull out the dents, but they still required a flush coat of Bondo. The picture above shows the Bondo before it was sanded. We still have a long way to go before paint...