 |
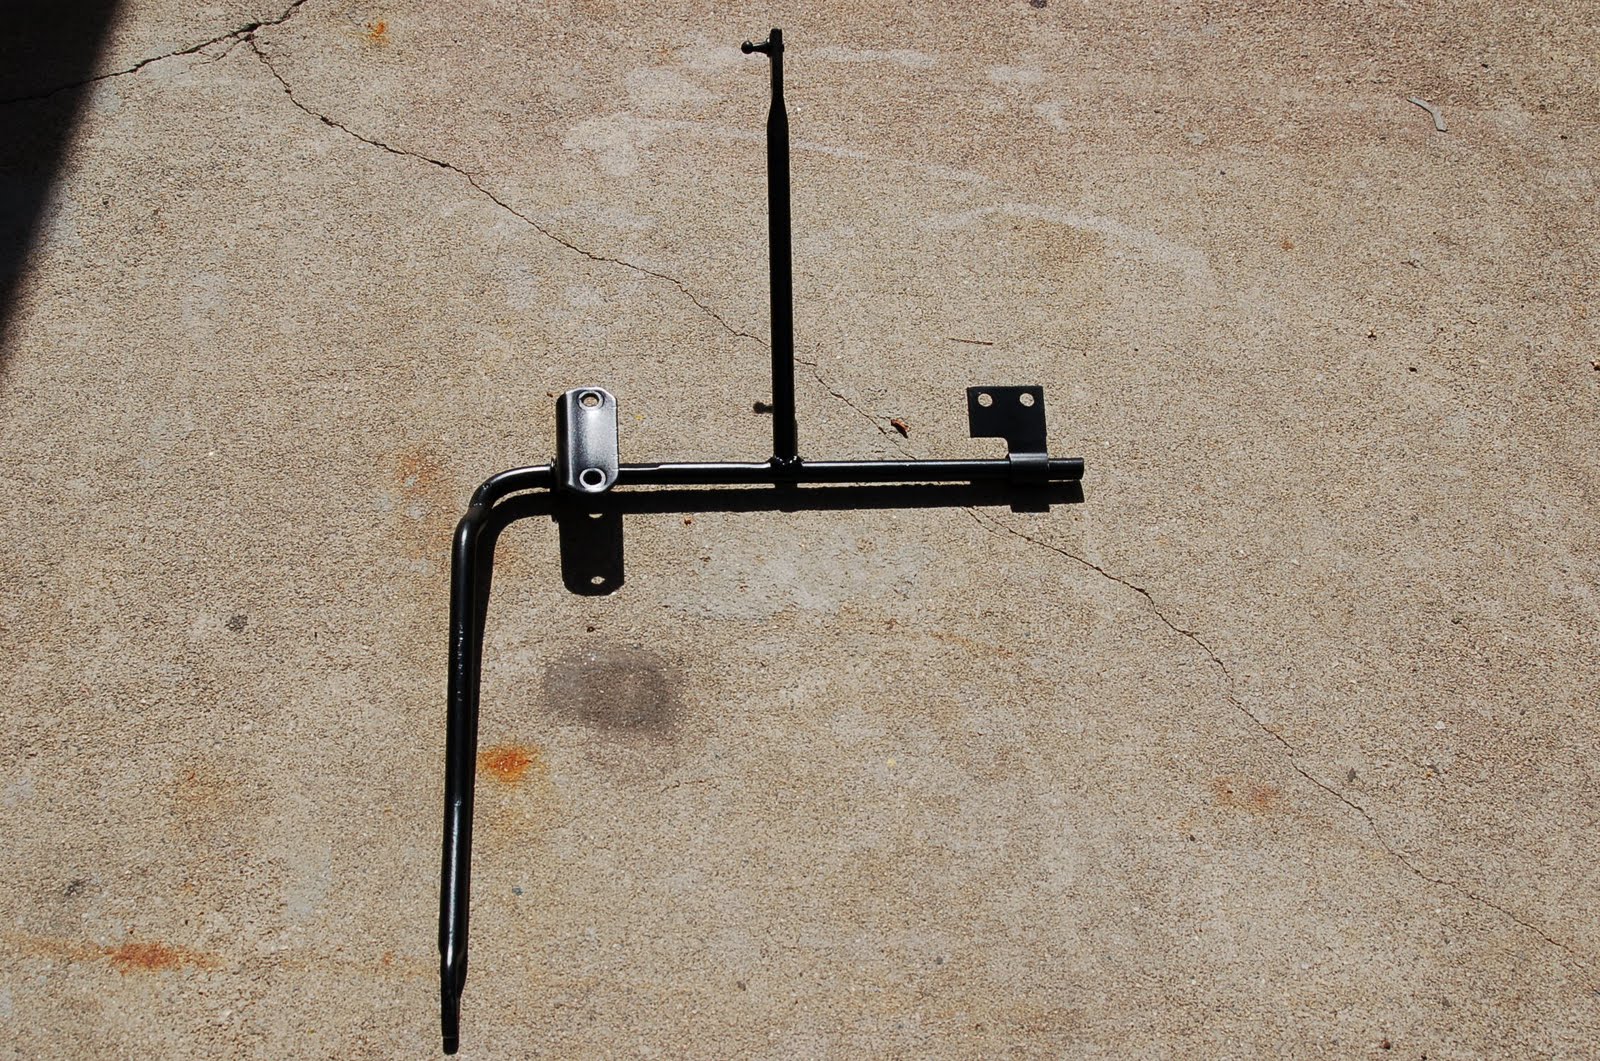
| Original 6-cylinder accelerator linkage |
Today Lauren had to work today which gave me the perfect opportunity to work on the Mustang before going to dinner at Benihana's and then to my men's softball game at the Grove. I started off the day with a plan to modify the accelerator linkage which was previously used for the straight six. It was designed to pull the arm on the 1-barrel carburetor DOWN on the left side of the motor while the V8 linkage is designed to pull the arm on a 2 or 4-barrel carburetor BACK on the top of the motor. It's quite a different setup and I wasn't about to spend $50 for a new linkage when I am fully capable of modifying my existing one.
 |
| Modified linkage for a V-8 |
I started by cutting the stock linkage where it started to bend forward to go alongside the straight six (but was now running into the middle of the V8 motor.) I then mounted the linkage and found out at which point I needed to cut the top half of the stock linkage to remove the bend and also allow it's height to meet the carburetor throttle. Once marking it and cutting it, I had to bevel out the end that was going to be welded onto the linkage so that I wasn't welding a flat surface to a rounded surface. You can think of it like the difference between trying to pick up a drinking glass with your hand straight and flat versus cupping your hand to fit the shape of the glass. I used a grinder to grind down the center of the top half just enough to fit about 1/2 way down onto the bottom half.
 |
| The gas pedal reinstalled with modified linkage |
Locating the correct spot to weld the linkage together was tricky because moving the weld a couple of centimeters at the base changed the location at the top by inches which changed the location the gas pedal inside the car (by making it either too high or too low.) On the fourth spot weld, we had found the right spot. Now the gas pedal sits right where it should and when it is about two inches off the floor, the carburetor is at full throttle. I had to leave a couple of inches due to sound deadening, carpet and a floor mat that will eventually be installed.

From a backside view, you can see the Holly stamp on the rebuilt carburetor and in the bottom left corner you can see the Holly fuel pump that I bought from the guy that sold me the clutch, pressure plate and flywheel in San Juan Capistrano. The linkage that is attached to the carburetor was found by my dad in the garage after looking though trays of nuts, bolts an other parts. It was bent up and had chipping paint, but I was able to straighten it out and clean it up. It is adjustable which could prove useful once the carpet is installed. You'll notice the water temperature sending unit on the back of the motor (right side of picture) which had previously been located near the distributor, but was now in the way and had to be moved to the back of the block. I filled the hole with the plug that was in the back of the motor.

From a front view you can see the new distributor installed that my dad bought a few weeks back. We hooked up the vacuum line to the carburetor, but haven't yet hooked up the coil. since we don't quite know where it will be able to mount without the power steering pump installed. My dad pulled a set of rubber valve cover gaskets and installed those as well.

Here is a top-down view of the motor where you can see we still need to install the alternator, power steering pump, water pump, pulleys, headers, radiator and spark plug wires. Of course there are still other things that need to be installed such as the starter, gas tank, battery, air filter and fuel lines from the tank to the pump to the carburetor, but we'll get there when we get there.
 |
| Modified Linkage painted and installed |


 From a backside view, you can see the Holly stamp on the rebuilt carburetor and in the bottom left corner you can see the Holly fuel pump that I bought from the guy that sold me the clutch, pressure plate and flywheel in San Juan Capistrano. The linkage that is attached to the carburetor was found by my dad in the garage after looking though trays of nuts, bolts an other parts. It was bent up and had chipping paint, but I was able to straighten it out and clean it up. It is adjustable which could prove useful once the carpet is installed. You'll notice the water temperature sending unit on the back of the motor (right side of picture) which had previously been located near the distributor, but was now in the way and had to be moved to the back of the block. I filled the hole with the plug that was in the back of the motor.
 From a front view you can see the new distributor installed that my dad bought a few weeks back. We hooked up the vacuum line to the carburetor, but haven't yet hooked up the coil. since we don't quite know where it will be able to mount without the power steering pump installed. My dad pulled a set of rubber valve cover gaskets and installed those as well.
 Here is a top-down view of the motor where you can see we still need to install the alternator, power steering pump, water pump, pulleys, headers, radiator and spark plug wires. Of course there are still other things that need to be installed such as the starter, gas tank, battery, air filter and fuel lines from the tank to the pump to the carburetor, but we'll get there when we get there.


No comments:
Post a Comment