Wednesday, August 24, 2011

Air Cleaner

I ordered a 3x14 round K&N air filter on Monday for the 'Stang through my buddy who works there. The filter currently under the hood is 4x13. I'm not sure when I'm going to fire up the motor for the first time, but I figured that I should have it ready to go at any moment. I should have the filter sometime later today and will put it in the next time I'm over.

My older brother put an Edelbrock chrome air cleaner on top of the carb to help keep the dirt out, but the chrome was damaged in four different spots. There were three spots where the chrome was worn all the way through on the top and the front lip was dented and the chrome was flaking off. I decided to take that lemon and make some delicious lemonade.


Since the spots that were worn through dipped down, I used a skim coat of Bondo to make it flush. Once it set, I sanded it down to be level and smooth and then prepped the rest of the cover by sanding it with 800 grit sandpaper to take a coat of grey primer.


Once that was dry I sprayed it with a few coats of flat black paint to match the rest of the black parts under the hood (i.e. valve covers, shock tower caps, headers.)


UPDATE 08-28-2011

I received my K&N air filter in the mail about 1 business day after ordering it since they are headquartered in the city next to me. I stopped by my parents house after church to install the air filter.


K&N Filter Installed (3x14)
I had to cut down a threaded stud to fit into the carburetor so that it wouldn't be too tall and go into the hood, but also long enough to have a wing nut fit onto the top. I cleaned the bottom pan of the filter since it had water spots and dust on it. What would be the point of having an air filter on the car if I left the dust that was sitting inside of the filter?

Sunday, August 21, 2011

Body work and Parking Brake


Lauren had to work today so it was off to the races to get as much body work done as possible in only a few hours. As you can probably guess, not a whole lot really got done. I did a lot of sanding to find even more low spots which proved to be dents from who I can only imagine to be someone who really didn't like the previous owner of my '66. the entire body on this car has had damage and its been very frustrating to fix. Don't get me wrong, its been a good experience thus far, but its still annoying.


I found the most recent one right at the back of the roof more on the passenger's side and it was about the shape of a persons hand in a fist. I put a skim coat of Bondo there along with another skim coat of Bondo along the side of the roof where I found three dents.


I found these two at the front of the roof in the middle near the windshield. They weren't very big, but they were dents that needed to be fixed. Maybe someone didn't know how to remove the window molding?


I also used the air tool to smooth over the rear of the quarter panel extension area where the end caps will mount. There were a lot of gouges that needed to be sanded down and now they are!


The last time I was over I spent a good deal of time trying to find the threaded piece for the parking brake and could not seem to fine it. My dad spent about 5 minutes looking for it and found it in the place that I searched at least three times. Sometimes you can't see the forest through the trees. I pulled out the wire brush wheel and polished off the years of grime that was on it as well as the spring and then painted them both gray. 


I had to install the spring first and then slip it into the lever before I could then use the lever to stretch the spring in order for the lever to fit. Once I figured out that would be the only feasible way to install the parking brake it went pretty quick. I adjusted the setup to make sure that the lever inside came out far enough, but didn't come out too far. I might have to adjust it again once I've actually driven the car and worn in the brakes.

UPDATE 08/24/11: The parking brake spring appears to have broken at some point and simply cut down to semi-work so I bought a new spring for $7.95 and will install it the next time I'm over.

UPDATE 08/28/11: I received the parking brake spring and it was much longer than the one pictured above. I didn't take any pictures of the new spring by itself, but I did get a picture of it once I painted and installed it. The new spring isn't quite so stretched out now.


Saturday, August 13, 2011

Hood, E-Brake, Headers, Speedo Cable


Today was a busy day for me when it came to the Mustang. Lauren had work and after the monthly mens breakfast I went over to my parents house to work on the car. My dad put a new motor on the air compressor since the old one burned up, but he was at work today leaving him unable to help me out on the car. When I arrived I noticed that he had been stripping the paint off the hood and my mom informed me that he had been out there every day this week to work on the car. Thanks dad.


It still needs a little more work done on the top before it's ready to paint, but I'm sure it will be ready soon. The passenger's side of the hood was pushed in a little , but nothing a little hammer couldn't straighten out. I'm debating whether or not I should put the F-O-R-D letters on the hood or if I should "shave" them. The rest of the car is going to be without emblems, but I kind of like the idea of having the letters on the hood. I started my morning on the underside of the hood with some scour pads and the air grinder.


It was far from being ready for paint since it had an undercoating sprayed on it sometime in the 80's. After realizing that it would take me a while to get it all off, I decided to recruit my older brother to help me so that I could focus on other things that needed to get done. He did a pretty good job cleaning it up.


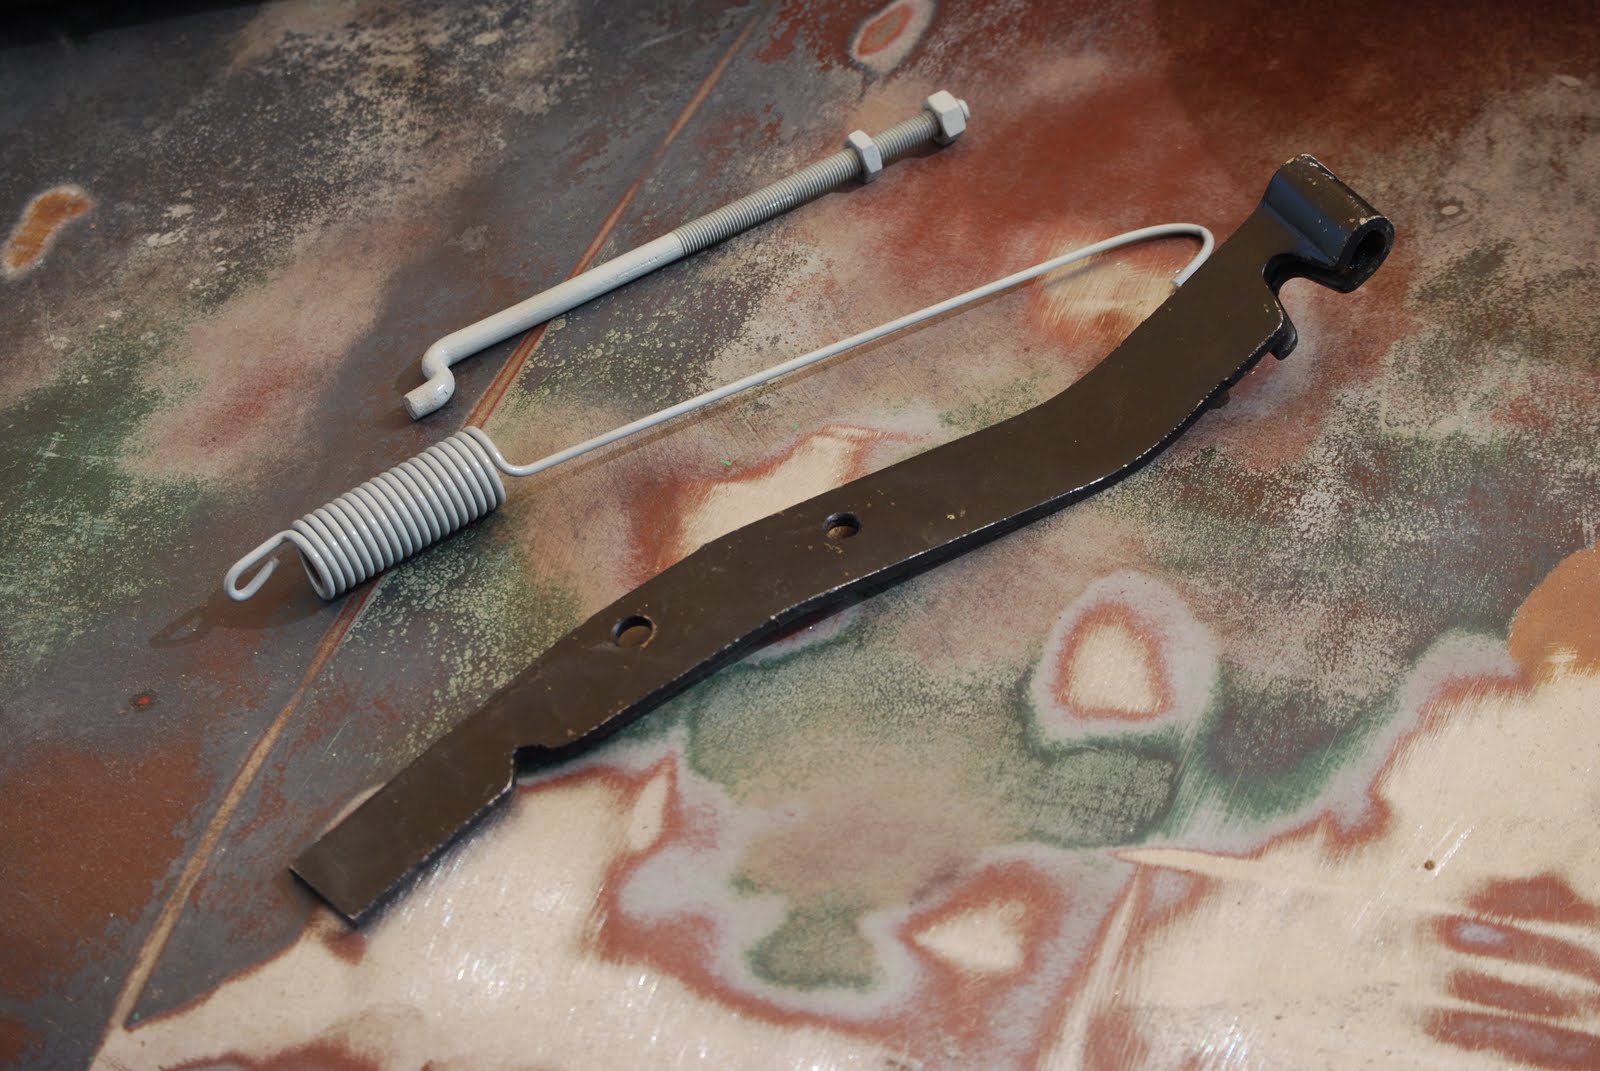
I had to weld an area at the front of the hood that was cracked near where the hood rests on the on the bumpers. I'm not sure what would have caused it to crack, but its welded now.There were a couple of areas that had dents on the underside of the hood in the frame so I flushed them with Bondo in preparation for paint. I ordered a handful of parts from CJ Pony last week including new mid-length headers from Patriot, a speedometer driven gear clip and seal, a firewall to steering column seal, a lower radiator hose stainless steel spring, and a new front parking brake cable since the original one was frayed.

Patriot Mid-length Headers


The Patriot headers look awesome and will work much better with the cable clutch setup than the former Hedman headers that were on the car before. They came in raw steel and needed a coat of paint, so I bought 2000* flat black paint to paint them:

Patriot Mid-length Headers Painted

The speedometer gear that I bought for the T5 is a 21 tooth based on the calculations I derived based on tire height, rear gear ratio and the drive gear in the car. I won't know if it is correct until I actually drive the car with the new rims.

21 Tooth Speedo Gear with Clip and O-Ring

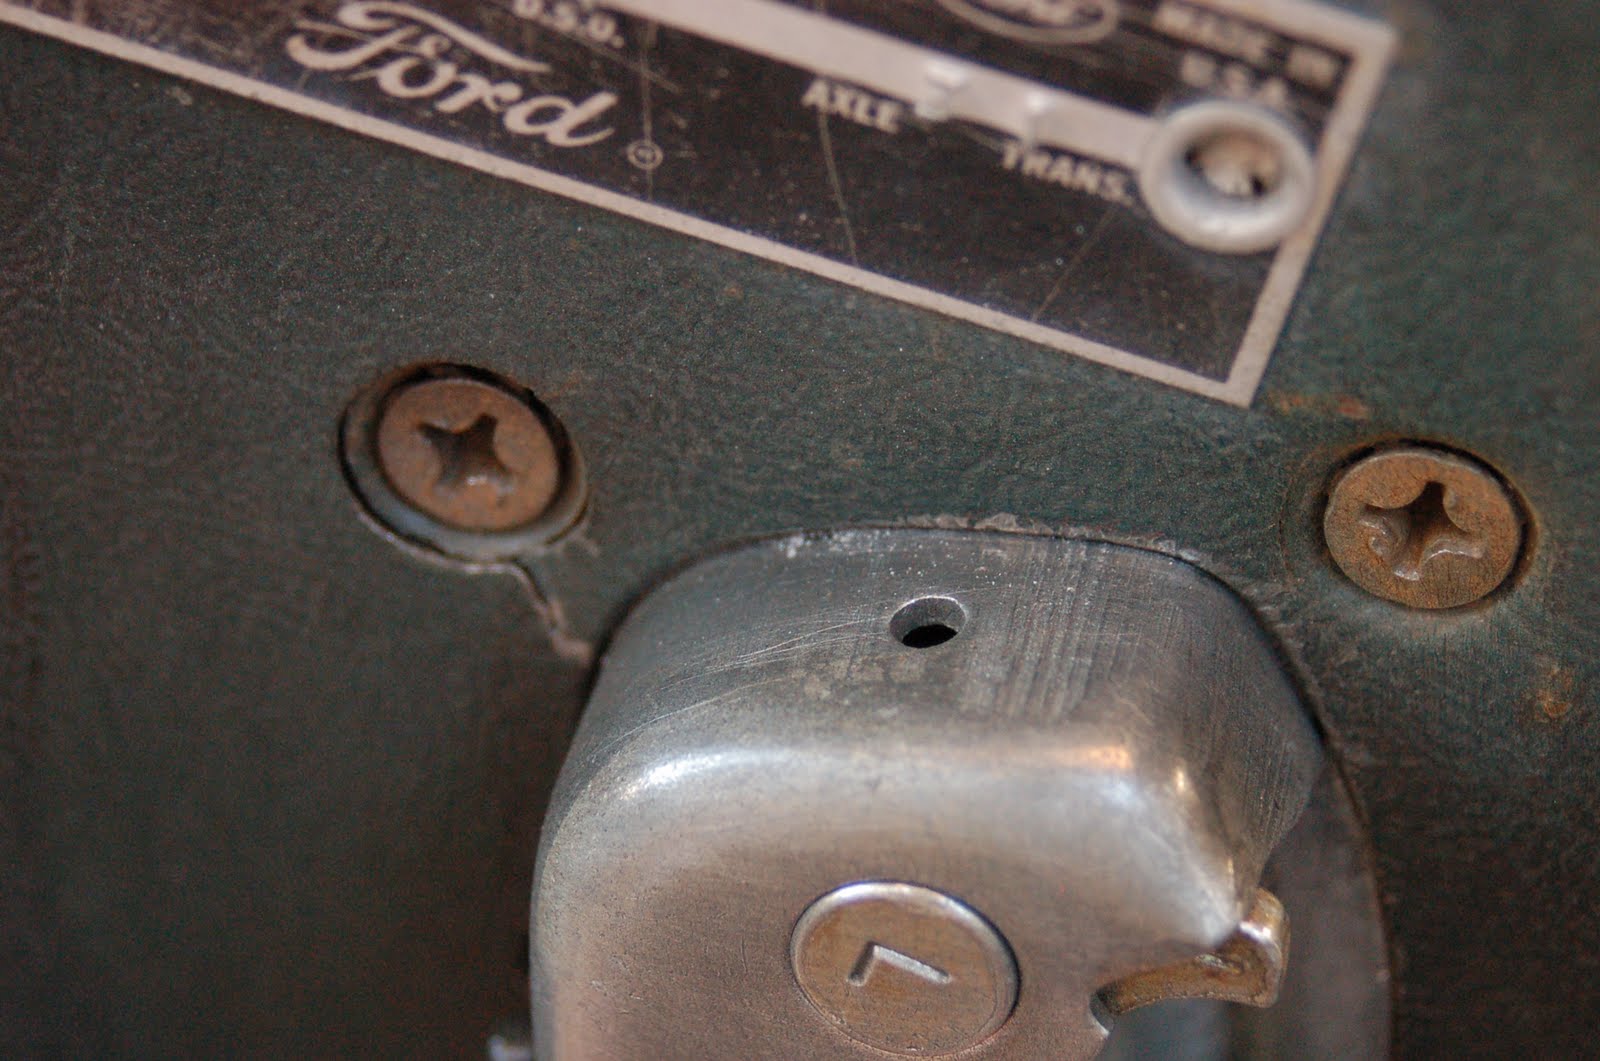
I also pulled out the front parking brake cable and handle in order to install the new one. While I had out the handle, I took the time to clean up the body of it and paint it. I was able to spot the original FoMoCo stamp on the part:

Parking Brake 

Once the headers were painted and dry, I slipped them in the car and bolted them up. The driver's side had much better clearance near the collector. Before the collector was right on top of the bellhousing and it may have caused some problems having the pipe run. The mid-length header extends out further leaving much more room to run exhaust.

Patriot Header Installed on Driver's Side

This is what the previous header looked like on the driver's side:

Previous Hedman Header 


The only problem I have with these headers is that two of the spark plug wires actually rest on the header--that's a problem. I'll need to pull off the boot and find one that will not sit on top of the header. The rest of the plug wires have plenty of clearance so it is only two on the driver's side that I need to worry about.

Patriot header hitting plug wires


The passenger's side header fits with no issues and the spark plug wires on that side don't his any of the header tubes.

Saturday, August 6, 2011

It Takes a Lieutenant Colonel to Sand a Car


Today Lauren played in a charity golf tournament with Nikki and friends to it was a perfect opportunity to work on the Mustang as I am preparing it for paint. I invited Darrell (my mother-in-laws fiance) to join me in working on it if he so desired. He chose to come and help me out since he knows I don't have a whole lot of time to work on it.

I arrived first and started by removing the headers that I installed about 6 months ago. There is a long story behind that and its not worth talking about, but I did want to note that my car is header-less again:


On a brighter note, I did order a set of Patriot mid-length headers for about $154 that were designed to work with the cable clutch conversion so they should fit much better than the previous Hedman headers that I had installed before. I will need to paint them, but I've already ordered some high-temp black paint and will have them painted before I install them.

65-66 Mustang Patriot Mid-Length Headers

After I finished that, I started drilling the holes for the export brace across the firewall area behind the motor. If you remember I welded in a strip of sheet metal over the existing support in order to make it look cleaner. I drilled the four holes necessary to put in the bolts to hold the brace and then I tightened it down.


While I was at it, I needed to drill a hole on each side of the fender aprons for the new monte carlo bar that I just installed. That took next to no time at all.


Around the time that I was finishing up with the drilling, Darrell arrived. I gave him a nickel tour of the car and then put him to work on sanding the dash (Luke's job last weekend) and also the steering column. It didn't take him too long to get it sanded.

66 Mustang Dash Sanded

In the mean time I was working on getting that nasty gold paint sanded off of the car since it tends to flake and would make for a horrible base under my brand new paint. Last week I sanded the gold off of the passenger side door. As you can see, there was some body work from the previous owner.


This week I needed to do some sanding on the driver's side door which definitely isn't as pretty as the passenger's side door.It looks more like a Picasso than anything else with all of those colors. This side must have had more body work than the other side.


Darrell spent the rest of his time cleaning and sanding the inside of the passenger's side door. From the factory there was a coating of an adhesive that helped seal the door panel to the door and keep the inside of the car more quite. He used a wire brush to get it all off and then used some sandpaper to sand down the black paint which will be replaced with the blue paint from the exterior of the car.


The driver's side door latch has some problems of its own because all three of the screws that hold it to the door have cracked. One has completed cracked all the way around while the other two are still holding on. I'm going to attempt to use a tapered washer to hold the latch onto the door. It is holding fine now, but I want to make sure that it stays fine in the future.


Petey didn't seem too excited to be hanging out with me while I worked on the Mustang, but then again, he's a dog and the only things that excite him are food and walks.