Tuesday, February 28, 2012

Frustrated

Yesterday wasn't such a good day in the life of my project. I had called the local muffler shop (DeAnza Muffler) around 10:30am to confirm that I would be driving the car to the shop to have them look it over in order to give me an estimate of the full exhaust install on Saturday. They called me back after about 15 minutes and said to bring it in at 3:30pm. I arrived promptly at 3:30 and they had closed shop early for the day and neglected to call me to tell me that. Needless to say, I called three different shops in the area to get quotes and will be going with someone else.

It began to rain pretty hard so I parked the car under my mom's canopy for her car so I could get some work done on it. The windshield guy from Los Compadres located at 3639 Rubidoux Blvd had come back out to seal the lower driver corner since it was leaking, but guess what was happening with it today? In case you couldn't guess, it was leaking from both front corners! Now I need to call them again (951-781-8074) to have them fix it. They have been very unresponsive to my complaints and it has been a horrible experience working with them.

The front suspension had begun to settle down after it's drive drive and fill up at the local gas station, but after my dad took it for a spin, the front-end started raising up again. It is about 3 inches too high and I can't figure out why. The spring looks to be seated correctly and everything else is bolted down. I don't know what the problem is. I pulled off the front tires to take a look and make sure that everything was in order and it seemed to be fine. 

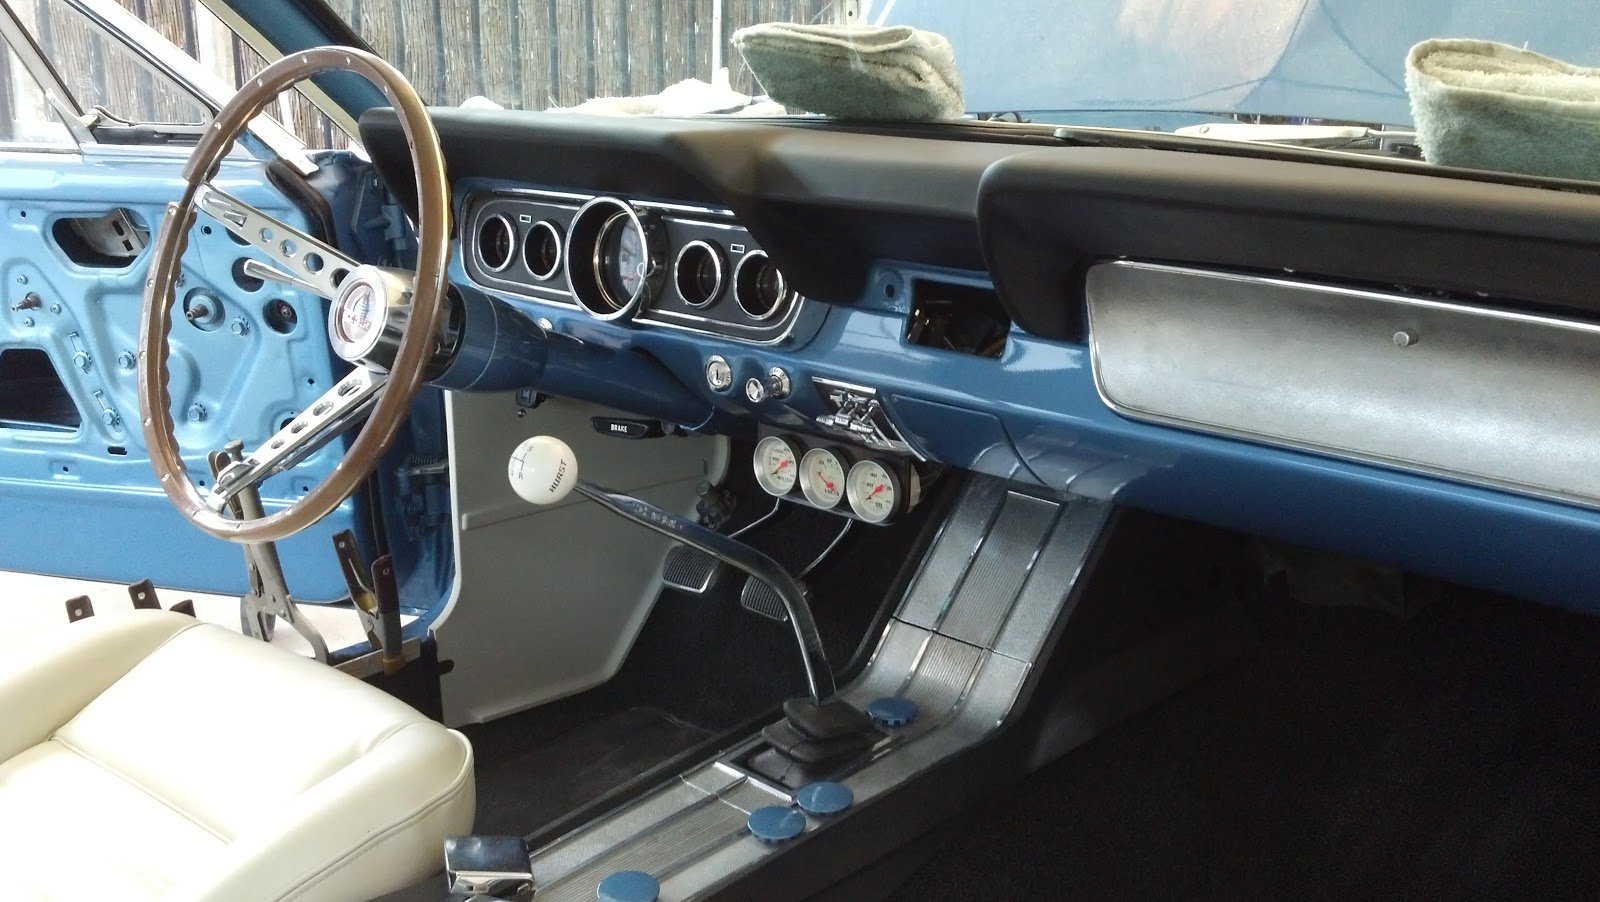
After I started wrapping up my wet afternoon working on the car, I realized that the passenger headlight wasn't working nor were the main gauge lights (although the extra tripod gauge lights were working and they run off of the same wire that runs to the main gauges.)

All of this just adds up to major frustration. There are so many things to do and such little time to get them done. I've been very busy with other stuff and I won't have much time to work on it the rest of the week.

On an even worse note, my wife's last living grandparent just died about an hour ago in her home. She was recently put on hospice and we knew that it was a matter of days. We have made a lot of trips out to visit her in recent months and we could see that her health was deteriorating mainly due to the leukemia that she was diagnosed with some months back. Unfortunately she didn't have any desire to accept Christ and unless something changed on her death bed her opportunities to accept Him have run out. It is certainly a sad day. Prayers for the rest of the family and their salvation are appreciated.

Sunday, February 26, 2012

New Carburetor & First Test Drive

First things first, the holly four barrel carburetor that I originally put on the car was acting up and was causing the car to run horribly. Fortunately my dad had an Edlebrock four barrel carburetor in the garage that he was planning on using on his 351 Cleveland motor that he had rebuilt. 

4 Barrel Edlebrock Carburetor
After attempting to tune the carburetor a little we decided that it was time to take it for its first test drive. My dad hopped in the passenger seat and we drove it around my parent's neighborhood to check the brakes and transmission. Once we drove around for about 1-1.5 miles we took it on a main road and took it to the local 76 gas station.

1966 Mustang Fuel/Oil Pressure Gauge
The tank is a 1970 Mustang 22 gallon tank that we put 5 gallons in a couple of weeks ago when we first fired it up. Today it took slightly over 19 gallons which means that it still had 3 gallons left. The total bill came to just over $80 with gas prices edging closer to $5.00/gallon. We'll see how the gas mileage does once the car is properly aligned.

1966 Mustang Speedometer
By the time we got home we had put just over 3 miles on the rolled back odometer. I wish I had paid more attention to the speedometer to see if it was accurate, but there wouldn't really be any way to tell. I'll have to have someone drive next to me to see if the speed is accurate. 

Once we got it back to the house we adjusted the timing  and idle. I asked my dad if he wanted to take it for a spin and he declined. About 15 minutes later he asked if I was ready to go for a ride (I guess he changed his mind). He drove it down an old one lane road with lots of stop signs. He was able to really test the brakes by accelerating quickly and stopping hard. After we turned the car around after about 2 miles we saw steam coming from under the hood and smoke coming from the rear. He pulled over and after a little investigation I saw that the smoke was coming from both rear brakes and the steam was from the overflow tank that didn't have a cap. The smell from the brakes was just hot brakes (not oil) and the water from under the hood was just because it splashed out of the overflow tank. We got it home and adjusted the rear brakes and we'll get a cap to put on the overflow. 

I took a bunch of pictures of the exterior of the car since I haven't taken any in a while. After driving it around a little, the suspension settled in the front (although I think it has more to go). Adding 19 gallons of gasoline helped the rear sit down quite a bit.  We adjusted the tie rods three different times after driving it around because the suspension kept on settling. 


1966 Mustang Quarter Panel
1966 Mustang Passenger Quarter Panel

The power steering pump was leaking from the back because the stud that the hose screws into was just loose enough to let some of the fluid leak out. It took a 15/16th wrench to tighten it up, but it stopped the leak.

1966 Mustang Front End
The windshield was leaking in the lower driver's side corner so I had the windshield installer come back out to seal it although it felt like I was pulling teeth to get him to come out to me. He tried to get me to drive out to his shop, but at the time the car wasn't registered or insured. He was going to come out the next day to install the top windshield trim, but he never showed nor called. My dad installed it today while I was at church teaching the 5th and 6th graders.

1966 Mustang Windshield

Friday, February 24, 2012

Registered & Insured

I was able to have my insurance agent come out to take pictures of the car in order to get it insured on Thursday afternoon. After looking over the car he seemed fairly impressed and said that everything was done well. I received my temporary insurance card via e-mail this morning and during my lunch break I swung by the Irvine AAA office which has DMV services. They gave me my registration tags for 2013 and also gave my an insurance quote that allotted me 7,000 more driving miles each year with the same financial limits as my other insurance policy and all for $50 less a year. I e-mailed my current insurer to find out if they can match the policy...if they can't I'll have to switch because currently I am only able to drive 3,000 miles a  year which isn't much when you live in southern California and there are so many beautiful places to drive with a 5-speed transmission.

The current plan is to see if we can get the Mustang on the road Sunday for a test drive. Once we're sure that it is reliable enough to cruise around (mainly that it stops) I'll set up an appointment to have the exhaust installed. I was quoted $560 to install 2.5" x-pipe over the axles with dual mufflers and hangers. Hopefully that holds true. Here is a clip of a similar mustang with the same basic setup and mufflers that I want except the mufflers won't exit the rear:


Tuesday, February 21, 2012

Heater Box & Fender Extensions

I received most of the parts I ordered from CJ's the other day except the passenger window regulator. I brought home the old blower motor and after testing it to see that it worked fine was able to clean it up and paint it. The heater box has four studs that stick out which the blower motor simply slides onto and is held down with four nuts.


In order to mount the box under the dash, those same four studs slip through the firewall and another four nuts will be used to secure the box to the firewall itself.


Before the new aluminum heater core went in, I laid down the foam pad that helps to cushion the heater core. You can see the cage that moves the air when the motor is running.


The next step was to lay in the heater core so that the inlet and outlet went out of the heater box through the holes you see to the left. I then laid another foam pad across the top to cushion it.


The defroster plenum is held onto the heater box by four screws (two on top and two on bottom):


The heater hoses should be run through the firewall and connected to the heater box before it is mounted under the dash since it would be nearly impossible to hook up the hoses after the box is installed.

The only other mounting point for the heater box is a bracket the mounts right next to the fresh air inlet under the dash. Unfortunately the motor wasn't working properly and neither was the switch so I'll have to replace both at the tune of about $160. I pulled the heater box back out and will re-install it once I have both parts.


The fender extensions were also repainted by my dad the other day and I was able to install the weatherstrip and mount them on the car. The color turned out great.


The fan override switch under the dash now works great and even lights up when it is on. This will control the two electric fans by turning them on if the relay doesn't work for some reason.


I took a couple of other shots of the interior now that it is mostly complete. It still needs the new window regulator on the passenger side so that I can then install the door panel and handles. It will also eventually need a radio to fill the hole in the dash.


Friday, February 10, 2012

Headlight Switch, Brake light switch and Driver door panel

I had a chance to work on the Mustang for a little while because Lauren was hosting a tanning party at our house for Valentine's Day. I started with the headlight switch because it's obvious that it is going bad so I went down to the local part store and purchased a new one. While was there I also decided purchased a brake light switch. Installing the switches didn't take too long. After I installed the headlight switch I tested the dimmer to make sure that the gauge back-lights didn't turn off as I dimmed them. It looks like the new switch solved my problems. Unfortunately the brake lights still don't work and after spending some time diagnosing the issue I found that the problem is the turn signal switch. When I traced the power to see where it is failing, I can see that power is being sent from the brake light switch to the turn signal switch, but then isn't leaving the turn signal switch and going to the brake lights. My dad ordered a new turn signal switch and it should come in tomorrow.

The driver side window rolled up fine so I went ahead and installed the door panel tonight. I also installed the door handle, the window crank, and the armrest base. Before I put on the door panel on I cut a piece of thick plastic that fit the behind the door panel and used some "liquid nails" to hold it on. This will keep out moisture and slightly help with road noise.

'65 Mustang White Door Panel
I had gone down to the DMV to get the car registered so that I can drive it down to the exhaust shop, but I was informed that if I wanted to register it before February 23rd, I would have to pay two years worth of registration since the 22nd is my registration renewal date. It doesn't make sense to pay for an extra year to have the ability to drive the car for an extra 10 days so I am deferring it until Wednesday next week. In the mean time I'll have the insurance company come out to take a look at the car so that I can get it insured before I drive it around to have the exhaust and alignment finished.

As far as exhaust goes, I plan on doing the following:
  • Patriot Mid-length headers (done)
  • 2.5" X-pipe over the axles but dumping right before the rear valance
  • Dual Dynomax Ultraflow (welded) mufflers
I've had glasspacks and I've had 2-chamber Flowmasters and I'm ready for something different. I was looking for more of a "throaty" sound and after listening to a lot of exhaust video clips I've decided to go with the Dynomax. The exhaust work will probably be completed within the next couple of weeks.

I've also ordered the heater box, heater core, new passenger widow regulator and a few other miscellaneous parts which should arrive on or around Thursday. this project is beginning to wrap up after over 2 1/2 years!

Tuesday, February 7, 2012

Scuff Plates and Side Mirrors

I spent a few hours working on the Mustang this afternoon and was able to put in the scuff plates and side mirrors.


Monday, February 6, 2012

Backseat and Trunk Weatherstrip

I had about four hours to work on the car tonight so I decided to finish up upholstering the rear quarter panels and installing them so that I could put in the backseat. We used the 3M Super Trim Adhesive that we've used on most everything else and clamps until the glue set. 


I had to buy the pads pictured below that allow the seat back adjusting bolt to rest when the seat back is in an upright position. This keeps the bolt head from rubbing through the upholstery.


With my older brothers help we pulled off the trunk lid so that I could properly put on the weatherstrip. It's very difficult to put it on while the trunk lid is mounted on the car because it simply wants to fall off while the glue is setting. 
  1. The open portion of the "C" faces into the middle of the trunk (not towards the outside of the car).
  2. The thicker, more flat side of the weatherstrip glues to the trunk (the other side is more rounded and won't sit flat.)


Here is an updated picture of the motor. I realized that I hadn't taken a picture of the engine in a long time and thought it was appropriate since we've been working with the starter solenoid and electric fan relay.


New Solenoid, Glued Carpet, Roof Rail Weatherstrip

With Lauren having to work again on Sunday, I had the opportunity to work on the Mustang for a second day even if it was only for part of the day. I swung by Kragen/O'Riley to pick up a new starter solenoid and the only one they had was the lifetime guarantee version (which I was glad to pay a little extra for) except the way it was setup was completely different from the original one. This meant that I had to extend and modify wires to reach the new solenoid.


I also had the opportunity to install the roof rail weatherstrip, but before I could do that I had to drill out the screw that mounts into the door frame that hold down the weatherstrip. On both sides of the car the screw was rusted in and I was unable to get it out so we drilled it and used a punch to knock it through. Although the weatherstrip rests in the molding, glue is still needed to hold the weatherstrip in place. I started by fitting it into the rail molding and then pulled back a section at a time to put in the weatherstrip adhesive. 


I also had the opportunity to glue in the carpet along the sill plate since it wasn't fitting snugly. Before I could glue, I had to trim the carpet back so that it wasn't rolling over the edge of the sill plate. The amount trimmed will vary depending on way the carpet is cut from the manufacturer. Once it was trimmed, I sprayed some 3M "Super Trim Adhesive" to the back of the carpet and to the surface that it would be stuck to and then used clamps and paint stir sticks  to hold own the carpet while the glue dried.


The last thing I was able to do was put in the kick panels and the windlace along both roof rails of the car. Unfortunately they don't provide enough with one order to go along the rear quarter panel so I'll have to place another order.


Saturday, February 4, 2012

Bad Starter Solenoid

My dad bent some tube and ran the fuel line from the fuel pump to the line that came from the back of the car. He also adjusted the brakes all the way around since they weren't engaging when I stepped on the brake.  I started up the car drove it back and forth over a stretch of about 15 feet. When I turned the ignition key into the off position, the car continued to run. We ultimately had to pull the battery cable to get the car to shut off. After pulling all of the wires on the switched side of the solenoid with the key in the "off" position, the post was still hot.


When we would hit the solenoid with a screwdriver, the tester light would shut off. I will be buying a new solenoid on my way to the house tomorrow morning since this one is obviously bad.

I put the deluxe steering wheel in the car although its not fully tightened down. There is a section on the wheel that needs to be repaired with a steering wheel repair kit (epoxy), but I'll get to that later. There are more important things to get done on the car (i.e exhaust, door panels, backseat, etc., etc.) 


Wednesday, February 1, 2012

Gauge Lights and Wiring

I had run all of the necessary wiring for the tripod gauge lights, but still had to hook up the hot wire to the dimmer switch so that the lights only came on when the headlight switch was pulled. I pulled the gauges out of the dash to get a better look inside the dash in order to do that. I found a wire off of the switch that controlled the gauge lights so I spliced into it without completely severing the wire. The manual gauges now light up along with the others.

I also had to patch in a new section of wire for the fuel sending unit under the car because the existing wire was broken. I used some wire shrink tube around it for more protection, but I won't know if the gauge works until I dump some gasoline into the tank.

I finally hooked up the manual override switch for the electric fans that cool the radiator. I had run the wire months ago when I installed the wiring harness, but had yet to install an actual switch. The switch is under the dash by the driver's door and is only functional when the key is turned. I wanted to make sure that I wasn't able to accidentally turn on the switch when getting out of the car and have the fans drain the battery. The green wire that comes off of the harness is a ground wire so I had to hook up a hot lead wire off of the accessory key position. 


I also ran some wire encasing under the hood on the wire that controls the fans from the thermostat, the nylon line that controls the manual oil pressure gauge, and the tubing that controls the manual water temperature gauge. I wanted to keep those wires protected from any heat that may come from the headers since they are in somewhat close proximity to them.

My older brother was able to install the rear bumper guards which I had polished when I was living in Anaheim Hills. 

Would you believe that I didn't take any pictures of anything while I was there? The next time I'm over which will likely be on Saturday afternoon, I'll get some pictures of what has been done. As you get closer to the end, there isn't as much "major" progress so it doesn't feel like as much was accomplished although every little thing counts at this point.