Friday, December 31, 2010

Headers Refinished

Since its the last day of 2010 and Lauren had to work, I went over to my parents house to work on the Mustang for about half of the day. Petey hasn't had any seizures since the last blog and seems to be doing great now. He did a little tanning while I worked on the car.


Today I started off by pulled Calvin's old Hedmann headers off the shelf of the garage and gave them a little TLC. They were covered in rust and as you can see, they were in dire need of some attention:

At first I just used a green scouring pad to clean them up, but figured that it would take a long time to clean up both headers so I switched to using an air tool that my dad has scouring pads for. I cleaned up both headers and they got pretty clean:

I had stopped by Autozone on my way to my parents house this morning so that I could pick up a can of high temp flat black paint for the headers. Fortunately it was only about $9.18 with tax. I also stopped by Vons to pick up some pre-made guacamole for the bean dip that we plan on taking to Mama Gail's house for the new years eve bunko bash. Once I had the surface rust cleaned off of the shorty's, I used some ether and a rag to clean off all grease to create a clean surface ready to accept the new paint (2,000 degree):

Once I was finished painting and allowing them to hand dry, I started working with my dad in seeing if the 1967 Mustang drive shaft would fit in my car with the T5 conversion yoke. Unfortunately the car only had 1/4" of free play which is far too little. According to all the sources I've found, there needs to be between 3/4" - 1" of free play. We only tested the driveshaft while the car was in the air with no weight on the rear suspension, so we'll probably need to try it again with a jack under the differential allowing the car's weight to rest on the leaf springs.

Since we werent' going to get anything done with the driveline today, I decided to clean up the power steering pump and put the rebuild kit in it. I didn't get any "before" pictures of the pump, but I had cleaned it up about 5 months ago only to let it rust again. We used a pulley puller to get the pulley off and I cleaned off all the new rust. We pulled apart the pump and put in some new seals and then put it all back together. It was a fairly quick process since we only had to replace seals and o-rings. I put a coat of black paint on it and its now ready to mount on the motor. All we have to do now is find a power steering pump bracket!

Saturday, December 11, 2010

Droppin' in the Drivetrain


Today was one of Lauren's weekends to work in December so I packed up Petey (since he had two seizures last night) and took him on over to my parents house to do some more work on the Mustang. He seemed pretty content sitting out in the sun while I worked.


This was the day that we were going to join together the 302 motor and T5 transmission and slip it into the car. The first thing we had to do was set up the hoist and take the motor off of the engine stand. Once we did that, we pulled out the transmission to get it for instillation. We had to install the pilot bearing before doing anything else so we cleaned out the hole in the back of the motor and applied some grease to work it in. We then set the engine spacer plate onto the back of the motor and then bolted on the flywheel. Once we had the flywheel on, we were able to mount the clutch and pressure plate which went pretty smooth.


Newly threaded bellhousing
Next we looked through buckets of bolts to find the bolts we would need to join the bell housing to the back of the motor. Once we found the six bolts we needed, the bell housing went on fairly quickly It took us a while to find the right sized bolts to hold the transmission body onto the housing because we were searching for a bolt that didn't exist. The previous owner of the housing must have put the wrong sized bolts in and stretched out the threads causing the ones that were supposed to be used to fit loosely and the next higher size bolt to be too big. Our only option was to re-thread the bell housing.


Bolting up the transmission to the 302
Once we tapped the four holes we were able to join the transmission body to the motor. You can see me trying to put in one of the bolts through the transmission and into the bell housing. We had tried to fill the trans with fluid, but failed to realize that the hole for the spedo-cable allowed most of the fluid we put in to leak out. I'll have to look into which cable it needs (1966 Mustang of 1986-1992) before trying to fill it again.


When we raised the drivetrain using the engine hoist and lowered the front of the car to make sure we had enough clearance to move the engine into the engine compartment. It barely scrapped its way in taking off a little black paint off of the oil pan, but it made it in. We had to put it in sideways with the rear of the transmission pointing towards the drivers side and the engine entering the compartment from the driver's side. Once it was over the radiator support, we lowered it in and began setting the motor mounts.

My dad did most of the work under the car by trimming the T5 conversion cross member to clear the e-brake bracket. He also had to drill the cross member because the hole on the passenger's side didn't perfectly line up with the hole in the body. While he did that, I greased and slid on the harmonic balance and put on the valve covers. Once we had the the transmission mounted, we were pretty much done for the night. I tried to wipe down the engine compartment since it was getting dusty. I also touched up some of the brake lines that had lost some of their paint.


Top view of the shifter coming through the floor
Although the T5 works great in older Mustangs, the shifter doesn't line up perfectly with the hole in the floorboard. Sometimes the hole needs to be trimmed in order for it to work properly. I think we got lucky with my car because it seems to just barely fit. Once we install the driveline we may find that we need to trim it, but for now it works. The picture to the right shows that it is closer to the front passenger's side corner (as it fits in all older Mustangs).


Motor all bolted up!
The 'Stang is coming along nicely. I'll probably need to spend some money on it now to buy things like a radiator, alternator, battery, distributor, spark plug wires, water pump, hoses, air filter, oil, etc, etc. For now its looking beautiful and I'm excited to get it running soon.

T-5 Info


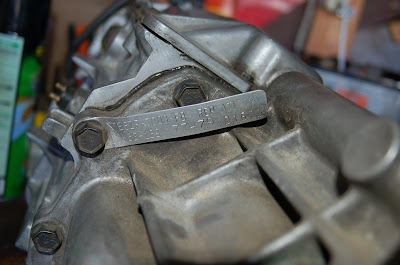
For some reason, it took me a while to find the ID tag on the T-5 that I purchased from Romeo in Los Angeles on June 30, 2009, but I finally found it while cleaning it a couple of months ago. He told me that the transmission was from a 1988 5.0 which could very well be correct since the ID number places it as being built for a 1986 1/2-1989 Mustang 5.0. The input shaft spins freely in all gears, but we still don't know the real condition of it since we haven't actually used it yet. We'll see how it works once we get the clutch cable installed and the motor fired up. Below is a chart with the gear ratio details and torque rating:


In Summary:

Max Torque= 265 ft/lbs
1st Gear= 3.35
2nd Gear= 1.93
3rd Gear= 1.29
4th Gear= 1.00
5th Gear= 0.68
Reverse= 3.15


The transmission now has a new bearing retainer seal and rear seal so its not as if I didn't do anything to the transmission after purchasing it. I have the T-5 conversion yoke for it because I bought it some time in 2002 or 2003 when I still had my first mustang. I intended to do a T-5 conversion, but then decided to sell the car due to high maintenance costs and high gas prices. I also had the cross member from around the same time period. It saved me from spending an extra $175 or so. If only I had purchased the clutch cable kit back then, I would have saved myself from spending $200 now.


Tuesday, November 30, 2010

Mastering the Brakes

Yes, I finally carved out some time to work on the 'Stang and I plan on making some more time to do that in the near future. On Monday I took some time off from work since my dad was on vacation and we finished installing the brake system. I had to pull the master cylinder off the car since it was beginning to rust due to recent rain. I cleaned it up and painted it black to match the rest of the engine compartment and then re-installed it on the firewall. In order to get the master working, I had to cut, re-flange and bend all but one of the brake lines, but by the time I was done everything fit correctly. We did have some trouble with leaking lines at first, but it was simply a matter of tightening the fittings at the master, proportioning valve or brake hoses. Together we bled out the lines so that there was no air in the system and we now have fully functioning brakes (with the exception of the emergency brake which can't be hooked up until the transmission cross-member is installed).


Once the brakes were finished, we set the intake manifold onto the motor and torqued down the bolts at 23 ft-lbs per the specifications book. We used the same manifold that I had on my first Mustang which was a four-barrel Edelbrock Performer RPM . We used FelPro intake gaskets and some new silicone gaskets for the front and back of the intake along with some extra gray silicone for good measure.


The next step will be installing the engine and transmission which are ready to go. My dad said that he would take some time to put the motor on the engine hoist and join the T-5 transmission and clutch setup to the motor so that we can just drop it all in at the same time. I have both motor mounts and the transmission mount ready to install so it'll be nice to actually use them. Not sure when we're going to drop the heart of the car in, but I would imagine that it is going to be soon.

Wednesday, June 23, 2010

Fabrication

In order to mount the rear brake hose I had to take the existing bracket, cut it, mold it and re-weld it back onto the underside of the car. That took most of the 1 1/2 hours I had to work on the Mustang yesterday. Now that Lauren isn't in class on Tuesday and Wednesday, I really don't have much time to spend on the car anymore. She constantly tells me to take my time and not rush home to get there when she arrives from work, but I don't see her much as it is, so I don't want to take away from our potential time together. There really isn't much else to report other than I bought some transmission fluid (ATF) to fill up the T5.

Saturday, June 12, 2010

Takin' a Brake

Today I installed:


...the rear brake lines across the rear differential, the rear brake hose....


...the master cylinder and...


...the front brake hoses.


As I've mentioned before, I still need to buy front brake lines to shape to fit the modified dual bowl master cylinder from a 1967 Mustang. I'm also going to need to modify the mounting bracket for the rear brake hose since its from a 1967 Mustang and would normally mount to a different location than my '66. Minor fabrications, but they'll still take some time.


I'm spent on Mustang money for now, but once some more overtime or DJing money comes in, I'll be able to get the front brake lines, pilot bearing and shocks. We'll be dropping in the motor as soon as I get the brake line ran across the firewall...its coming together.

Wednesday, June 9, 2010

I Can See Clearly Now


This past week hasn't been a good week to work on the Mustang. I did stop by on Wednesday to do a little bit, but ultimately was only able to work on it for about 2 1/2 hours. I took out the passenger side wing window and regular window and then used some rubbing compound and a buffer to polish both regular side windows and the rear glass. It looks like the rear window has a lot of pits on the inner part of it. I know that it sat in a body shop for a while so my dad thought that maybe sand blasting caused these pits to form. I am faced with two options 1) Tint the windows or 2) replace the back glass. I'll probably go with the first option since this is California and it gets mighty hot in the summers. Tinting the windows would be best done while they are out of the car anyways.

My brake parts were delivered to my parents house on Thursday so I'm going to go over this afternoon to install them. I'll still need the front hard brake lines to run from the master to the proportioning valve and then to the front hoses and rear line.

At least the windows are looking crystal clear now!

Saturday, June 5, 2010

Check Out the Oil My Cadillac Spills...

I finally broke down and bought the emergency brake lever and bar for both sides from Mustang Village in San Bernardino, Ca today. After much searching and reviewing of old photos, I determined that the 8" rearend that I purchased never had those parts. It cost me $54 (including tax) to pick up the parts, but it allowed me to move forward with the installation of the rear brakes.


On my way over to my parents house this Saturday, I also stopped by Kragen to buy a 1967 Mustang master cylinder since it has separate reservoirs for the front and rear brakes leaving me less susceptible to complete brake failure if the master gives out or if I have a leak in a line on the front or the rear. Unfortunately it came with the push rod installed and in attempting to get it out, I broke the new master cylinder--there goes $45 down the drain. I didn't bother to take a picture of that since it was frustrating enough to have to look at it without having to be reminded of that frustration whenever referring back to this blog.


Once the rear brakes were on, the only tires I had to put on the back were my mom's stock 2007 Cadillac CTS rims. I was surprised to see that they fit and had enough backspacing for the '67 rear in my '66. I have three different kinds of rims on the car,The spare on the front left, my brothers old rim on the front right, and my mom's CTS rims on both sides of the rear. It's quite a sight to see. The car is still in the air until I have the brakes fully hooked up which will still require new hoses all the way around, a new master cylinder, and hard lines on the front. I have ordered all of those parts with the exception of the hard lines which will have to be customer made due to the dual master which these cars didn't have in 1966. I'll need to buy some straight tube and mold with with my dad's tube bender tools.

Friday, May 28, 2010

Brakes, Seals & Bearings

Softball is done for a month so I spent my Thursday afternoon working on the Mustang. I went with my dad to Kragen/O'Riley's to buy brake spring kits for the front and rear, spark plugs and rear brake shoes. My dad had already picked up the front drum bearing seal, rear axle housing seals, and spindle washer/nuts on his way home from work. The spindle washers/nuts I bought from Kragen for a 1966 mustang were no good because they were too small for my spindles. The guy at the brake parts shop in downtown Riverside said that I needed 67/68 washers and nuts and as it turns out he was right. I don't understand why that would be the case if I have spindles for a 1966 Mustang...unless the guy who sold me the spindles was lying (he is a mechanic that told me he pulled them off of a 1966 Mustang.) Oh well--so long as the car aligns correctly then I guess we don't have a problem.


I installed the new brake springs on the front so that they mounted in the correct location. If you recall from my blog yesterday, one of the upper springs was so short that it had to mount in the top hole instead of the second one which changed the leverage. Now the top blue spring is longer which allows it to reach further.I definitely feel more confidant with my braking capabilities with these new springs on here.


Once I had new springs on both sides of the front end, I had to pack the wheel bearings with fresh grease. My dad and I spent some time earlier this week cleaning the old wheel bearings rather than buying new ones since these looked to have been replaced at some point. Each drum has a large and a small bearing. The large bearing sits further back on the spindle inside the drum and is locked in by the drum seal (which we replaced today.) The small bearing goes on after the drum is on the car and is held on by the spindle washer/nut that can be easily taken off to change the brake shoes. We used a high temp wheel grease to ensure longevity of life.


Once the bearings had sufficient grease packed in, we set both drums on the front of the car. Although we were ready to put tires on the front, we couldn't immediately find them so we moved on to working on the rear of the car. Let's not forget that I also tightened all the locking nuts on the steering...that's kind of important.


The rear was a little more difficult because since I had coated the rear-end and the backing plates with POR-15, the bolt holes were too small for the bolts. We had to pull out the drill to get the excess paint out of the holes. The axle bearing also had a hard time going in on the passenger side because there was a small amount of POR-15 in there as well; it wasn't anything a razor blade couldn't fix. Once the excess paint was out, we put a coat of bearing grease in the axle housing to protect the wheel bearing (sorry the picture is a little blurry since I was a bit shaky when I took it.) You can also see the new axle seal to keep the oil inside of the axle and off of the rear wheel and brakes.


Once the new seals were in, the paint was cleaned up, and we had a fresh coat of grease lining the housing, we slipped on the backing plates and the axles. We also put on the new wheel cylinders, but have yet to set the brakes and springs since we need to first locate the parking brake lever that goes on each side. We have all of the brake parts together, but for some reason can't find that one part. Without it I can't set the parking brake and would have to leave my car in gear when parked so that it won't roll away. Other than that, we are ready to put some times on her and set it down o the ground in order to put in the engine and transmission.

Thursday, May 27, 2010

Brake for Pedestrians

I only spent about 1 1/2 hours at my parents house working on the 'Stang, but that time was well spent. I was able to get the brakes on the car which will next allow me to put on the drums and then the front tires. I'm still waiting on a set of spindle nuts and lock washers since the ones I ordered from Kragen are the wrong ones. My dad went to a brake specialty shop to order them and they should be coming in today. I'll swing by after work to work on it for a couple of hours and hopefully set the rear brakes (if I can find the e-brake bar). The one thing I don't understand is that the brownish spring on both sides should be a longer spring and it should mount on the lower hole, not the top hole according to the other pictures I looked at. I'm not sure if I need to get another spring, but that's the way its set up for
now.

Tuesday when I worked on the car, I spent my time cleaning the same brake parts that I installed yesterday. This has been a very tedious project so far. Every nut and bolt has been taken off, cleaned/painted and put back on the car so far. It has been coming along a little slower than I first anticipated, but it's been good to spend some time with my dad.

Saturday, May 22, 2010

Odds and Ends

While Lauren spent the day with the girls for Reghan's birthday, I decided to spend a few hours working on the 'Stang. I suppose to finished all I set out to do, but I really didn't set out to do a whole lot to begin with. Since I ordered a bunch or parts that won't be delivered until Wednesday, I figured that I would just work on some of the random things that needed to get done.


I started with the T5 conversion crossmember that I bought on Ebay about 10 years ago for my first Mustang (but then never ended up using). The last person that had it cut a section of it out to work with a bigger transmission. Although it would still work for my purpose, I decided to cut a piece of sheet metal to fit in the gaping hole left by the pervious owner and weld it in. I didn't want to leave a big open hole under the car where water could get in and cause rust. I had to also cut a small piece of the sheet metal to fit where a smaller hole was left open. By the time I finished welding in the new metal and painting it, it didn't look too bad. The picture is a bit shadowed, but you get the idea.


The next thing I worked on (which I didn't get pictures of) was welding the driver's seat frame together. Somehow, all four points that the frame rails welded to the frame were broken leaving no way for the seat to work. I stripped back the upholstery, ground off the paint and rust and went to town with the mig welder. I was able to get the seat back together with the seat studs set at 14" apart from center to center. I set the seats in the car to make sure that they lined up correctly because I would hate to upholster them down the road and then have them not fit properly in the car.

I pulled out the bench wire wheel and cleaned up the intake bolts so that we can set it next week when I'm over...sorry, no pics of those either. I also painted the valve covers that my dad worked so hard to clean up. I painted them a flat black engine paint that I also used on the oil pan. I think they turned out pretty good for original ford valve covers. By the time I was done with these, I was ready to come home. There wasn't a whole lot that I could really do today without the parts that are coming next week. Once they're in, I'll be able to set the front and rear brakes and then put on tires in order to set the car on the ground.

Thursday, May 20, 2010

Paint This

I was only able to work on the Mustang Wednesday this week since Tuesday I spent my time after work taking down two of Darrell's satellite dishes and then getting the house ready for Brad and his 4 nieces to spend the night before heading out to Disneyland the next morning. Yesterday all I really had time to do was to clean up the engine/oil pan and paint them. My dad spent his time stripping down the valve covers that were on the 302 he pulled out of his '67 Mustang. They have the original raised ford emblem on the top. I'll probably paint those black to match the oil pan.

As you can see to the left, the timing chain cover still looks great after Tom cleaned it last week. The oil pan also looks fantastic thanks to Tom. I also painted the harmonic balance but didn't bother to get a picture of that nor the valve covers. I just bought some more parts to help me move forward with putting the car together and the should arrive next Thursday. I bought the engine mount, trans mount, differential gasket, 4 wheel cylinders, 2 spindle lock nut kits, power steering rebuild kit and front brake shoes. I'm bummed that the parts won't be here until Thursday since I work on the car on Tuesday and Wednesday, but now that softball is over for the season after today I might change the days I work on the car.

I'll swing by on Saturday to work on the car while Lauren spends time celebrating Reghan's birthday. My guess is that I'll be welding the transmission mount since it was altered before I bought it. I'm not sure what else I'll do, but I'm sure I can come up with something since there is plenty to be done.

Wednesday, May 12, 2010

Mechanics

As I mentioned before, the rearend is now mounted in the car although I have yet to put in the third member and axles. I need to buy the new axle seals and the third member seal before I can put it all together. This rearend is probably from a 1968 mustang and is actually an 8" and not a 9" even though it has the wider set axle housing. I had to buy the wider u-bolts and also had to drill out the leaf spring perches just to fit the wider u-bolts. It was a lot of hassle for a rearend that isn't even a 9". Maybe one day I'll pick up a 9" and drop it in, but the one I have now is better than the 6 cyl. rear that the car came with.


The motor started out today in pieces, but at least it was clean. As you can see to the left, the cylinders are all clean now and no longer have carbon buildup. You can also see that the cylinders are in different positions because of the pre-set firing order of each cylinder. The heads were re-surfaced since they were slightly warped.


Before putting the engine back together I put on a new timing chain and gears. The old timing chain had a lot of slack in it which was cause for concern so my dad picked up a new set along with the engine seal kit. I took a picture of the timing chain and gears after I put on the new ones while putting tension on the chain to show how tight they are. We ended up having to putt them back apart because the timing chain cover wasn't sitting flush against the block. As it turned out, the upper gear (larger one) was for a 1970's 302 and therefore wasn't the right one. We ended up putting the old one back on and the chain fit just as well, but this time the cover sat flush against the block.


I also spent about 30 minutes prepping and painting the pressure plate for the transmission since it is only bare metal and rusts easily. I painted both sides, but included the picture I took of the pressure plate side since it was facing the Mustang and I always take the opportunity to get the car in the background if possible. The surface of it is smooth with no ridges so I'm not going to worry about resurfacing it.


Getting back to the motor, after we put the timing chain on, we put on the heads, then the oil pan, then the lifters, and rods. Next week we'll put on the intake and then we can probably clean it up and re-paint it Ford blue before putting it back in the car. With my next overtime check, I'll buy the other motor mount and rearend seals so that we can set the car back on the ground and then drop in the motor.

Cleanliness is Next to...

Yesterday Tom Standley came over and helped me work on the 'Stang for a little bit. I had him put on the front backing plates and clean the timing chain cover as well as the oil pan which were both lookin' pretty gnarly. He had a magic touch and made them sparkle like new.

My dad spent some time cleaning the block to get it ready to put back together, but we never had the chance to actually do that yesterday--that is going to be today's project instead. I spent my time cleaning the head bolts, drilling the leaf spring mount plates, and mounting the rear end (minus the 3rd member and axles).

It's coming together piece by piece, but still has a ways to go. My hope is that today we'll set the heads, intake, new timing chain and cover. I'll probably clean up the front brake springs and possibly set them on the car. My plan is to post some pictures tonight or tomorrow of the progress we've made over the past couple of weeks so check back if you're looking for updates.

Thursday, May 6, 2010

Spun

Still no pictures to document the progress of the Mustang since although I had my camera, I didn't have my memory card. Yesterday was the 5th of May (Cinco de Mayo) so I met Rachel and Steve at Peppermint Ridge and helped with their annual celebration which left me much less time than I had on Tuesday to work on the car. All I did was pull off the old spindles and put on the correct ones and then mount the rear leaf springs. I also cleaned up one additional part for the brakes and painted it. Of course neither set of spindles I've purchased have spindle washers or spindle nuts and to purchase them will be difficult because normal parts stores don't sell items like that.


Next week I think Tom Standley is going to come over and work on the car with me. We haven't hung out in quite some time. In fact, I think the last time we actually hung out, we went to a pick-a-part to find sunvisors for Lauren's Sentra.


My dad took the heads into the machine shop yesterday and they told him that they were slightly warped due to overheating (which happened on a couple of occasions when I had the car.) They are going to plane them and they should be ready by Friday so Tuesday the engine can go back together. They have a set of 351 Windsor heads that my dad wants to pick up and drop on the 302, but I don't know if that is going to happen or not. Whether we put on the 351 hears or the 289 heads, I'll be happy.

Tuesday, May 4, 2010

Spindle This

Since realizing the the spindles I purchased wouldn't fit on the car last week I have been keeping my eyes open for someone selling a used front set of spindles and brakes on craigslist.org. I have found some fairly good deals there so I try and buy all my parts from there if I'm looking for used. Late this afternoon I saw an add for 1966 Mustang 5 lug spindles posted and the city they were in was Riverside (where the car actually resides.) Once I got to my parents house I called and the guy said he would take $140 for them both.


I picked them up and spent the rest of my time pulling them apart, cleaning them and painting the spindles and backing plates. That was all I got done today, but at least tomorrow I should be able to put them on my car. The springs on both sides looked fairly new as did the brake shoes. The drums were a little rusted so we are going to use the ones that came with the other set of spindles since they are the same size.

My dad cleaned up the heads and is going to take them to the machine shop tomorrow to have them planed if necessary and just have them checked in general. He took in a new Chevy cam, lifters and crank that he had from D.J.'s old Chevy pickup and traded them for a complete motor gasket set for my 302. The set comes in tomorrow so when he takes the heads in to have them checked, he'll pick up the gasket set so that we can start putting the motor back together to set it in the car. Since I now have a legitimate set of spindles, I can put front tires on and I can also drop in the rear differential so that I can put on the back tires which will allow me to set the car on the ground for the first time in many months.

Wednesday, April 28, 2010

Motor Madness

After realizing the the spindles and brakes that were sold to me were for a 1967 Mustang and will not properly work on my 1966 Mustang, I have decided to put off the front steering and instead focus my attention on tearing down the motor for a check and new seals. I'm in the process of deciding whether I want to simply give in and spend the $540 on a complete Granada disc brake conversion or if I want to spend around $2o0 to find new front drum brakes and spindles and then buy spring kits and new brake shoes. In any case I don't exactly have the money lying around to do either, so I wait.

The motor that we're using in the 'Stang was formally in my first 1964 1/2 Mustang that my dad and I built between 1997 and 2000. It was in the car for maybe 2 years until I pulled it out to drop in my dad's 302 from his 1972 Ford pickup truck since i figured that the motor in his truck was better. My original motor is a Ford 302 bored over .30 with a mild street cam (with something like a 580 lift I believe, but its been 10 years since we had a machine shop put it together.) The heads are 1963 Ford 289 heads that had new valves, springs, and hardened seats put in when the engine was rebuilt. It was great on the street and was able to get up and go when I mashed on the gas, but after I dropped in my dad's pickup 302, I noticed that it felt much more sluggish off the line and in acceleration. The combination of the 302 block with the 289 heads was a much better choice for the Mustang. I'm glad it didn't get much use before it was pulled out to sit on an engine stand in my parents garage for 10 years.


It had an Edlebrock Performer RPM intake manifold and will possibly have a 4 barrel Holly carburetor on top of it. I'm not sure what the cfm output on the Holly is, but I'm sure it will be more than adequate for this 302. As you can see, we kept some masking tape covering up the hole where my old Edlebrock 4 barrel carburetor used to reside atop the motor.


This motor always seemed to run hot which is mostly due to the small sized radiator that Ford designed to go into the 65 and 66 Mustangs. After pulling the heads, we could see that there was water that leaked into the right (passenger) side of the motor. There was a little rust where the valves are on a couple of the cylinders...nothing a new head gasket won't fix! My dad is going to take both of the heads to his machine shop and have them checked to make sure they don't have any cracks and don't need to be planed. We'll probably put the motor back together next week and we'll then be able to drop it in the car. Oh happy day.


Here are some pictures of the cast stamps on both the heads and the block:

C8AE 6015-B 302 Block

I found a blurb about the casting number on my 302 on ClassicMustang.com:

"They did however, design and produce a 302 block that was used on 289s after the stock of 289 blocks was depleted. The number was C8AE-6015-B with 302 marking in the lifter valley."

"C8AE-6015-B is a 302 block from the Windsor plant that was used in 1968 on a 289."

289 Head Stamp

289 Head Stamp

289 Stamp on Head


302 FoMoCo block lifter valley

302 rear of block stamp