Saturday, February 26, 2011

Keeping the Chrome

With money going out faster than it's coming in, I'm reduced to doing what I can with the Mustang that doesn't require additional money. I stopped by my parents house on my way to the spring co-ed opening softball game at the Grove. I grabbed a few parts to bring home and polish in hopes that they would turn out good enough to use so that I could save some money having to buy new parts.


Polished reproduction Gas Cap
I thought that the above gas cap was the original, but after looking on the back and seeing a stamp that says "this is a reproduction part by Pro Products USA" I realized that I was simply polishing a replacement part. I wanted to buy the 1965 gas cap, but this one turned out so nice that I'm going to have to just keep it and save the $50 that a new one would have cost.


passenger and driver window cranks
Before I'm done I'm going to need a total of four window cranks although I was only able to find two the other day. One of the above cranks is actually a reproduction and the other is an original although they look pretty similar in wear. If I can find the two missing ones and they are able to polish up to look close to the ones above, I will be saving $40.


driver and  passenger interior door handles
Both of the interior door handles that I found are both originals and actually cleaned up quite nicely. Interior door handles run about $20 a pair plus tax.


polished deluxe steering wheel
The steering wheel above appears to be a genuine Shelby GT350 steering wheel. I believe that it belonged to Calvin and has been sitting on the garage shelf for years now. When I found it, it was covered in rust and gunk. I brought it home and took it apart in order to give it a good polish and even found some genuine ford part numbers on the middle horn ring where it says "GT.350." I believe one of the part numbers is "C60A-3655-A". On the steering wheel itself the part number is "C5ZA-13A800-D". I'll need to buy an epoxy putty kit in order to fix the gap on the left side, but once I do that the steering wheel will be ready to put into the car. The steering wheel that I was going to buy was $175 and you know what they say...$175 saved is $175 earned.


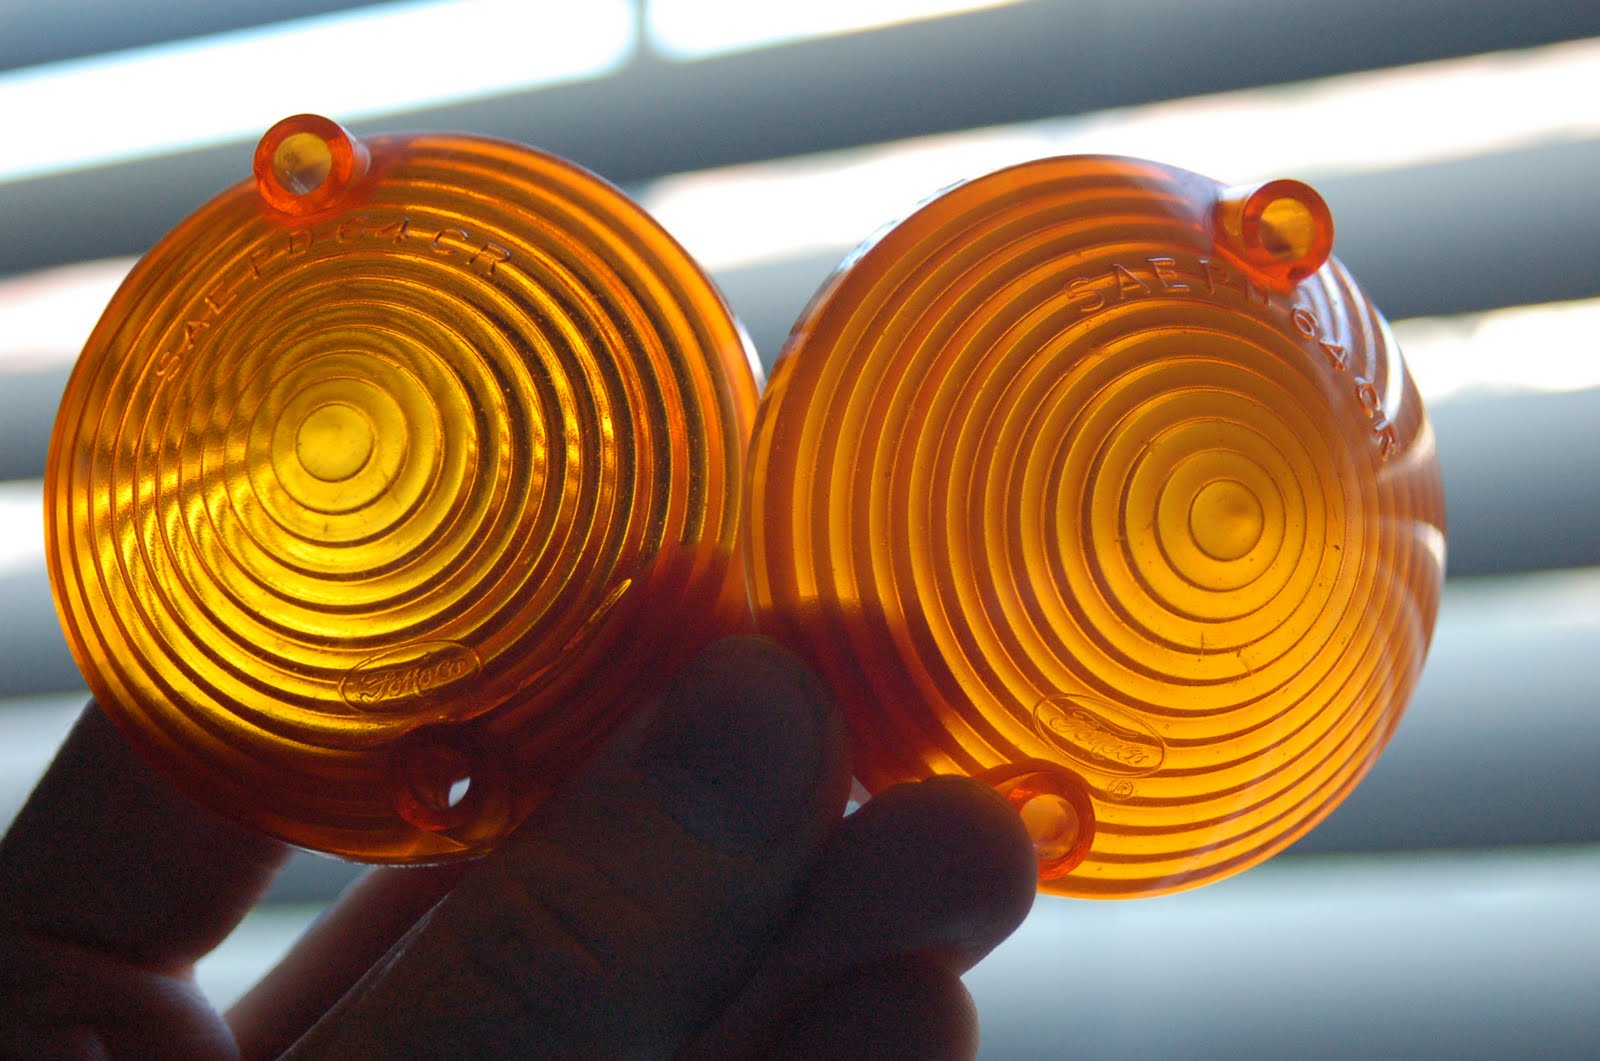
cleaned original blinker lenses
I know that the blinker lenses are probably around $5 for both, but since I had two good ones that were able to polish up nicely, I went ahead and spent ten minutes cleaning them so that I can reuse them. Something to note on these originals have the "FOMOCO" stamp on the bottom whereas the re-manufactured ones wouldn't.


cleaned/polished brake lenses/bezels
I also cleaned the brake light bezels using the chrome polish and then cleaned the brake light lenses using Plastic-X polish. I must say that the lenses turned out pretty darn nice. I'll probably re-paint the middle of the bezels with some black semi-glass paint to get them back to original. Notice the "FOMOCO" stamp on the bottom middle of the lenses.


polished heater control plate

This is the heater switch place with levers. I pulled most of it apart in order to clean each lever and then used some white lithium grease to make sure that the movement of the levers are smooth. I also found a brand new set of heater cables in the garage for a 64-66 Mustang which must have originally been purchased for Gary's Mustang back in 2000. I switched my old, tired cables for a fresh new set which moved effortlessly.


Polished exterior driver and passenger door handle
After looking through a few different exterior handles, I found these two which cleaned up quite nicely and will work perfectly for my restoration project.


polished dash lighter
I cleaned the wiper switch bezel as well as the headlight switch bezel, but have only included a picture of the lighter which I just recently cleaned after finding it in a box of old Mustang parts. The one that came with my car was an aftermarket plastic one...quite ugly. This one looks much better!

Sunday, February 13, 2011

Rear Window


I brought home the original review mirror from the Mustang since it looked like it was salvageable. I had picked up some chrome polish/rust remover while I was at Kragen the other day getting the u-bolts for the driveline. I had 30 minutes to work on a small project so I took on the mirror.


With a little chrome polish and a little elbow grease it looks almost as good as new. There is one small section on the bottom of the mirror that it missing a chunk of chrome, but I think I'm willing to live with that in order to have an original mirror in the car. I might be able to cover it up a little with some silver paint as to not draw too much attention to its imperfection. I think it turned out pretty nice by the time I was done with it:


Saturday, February 12, 2011

My First Mustang

1964 1/2 Mustang in parents driveway on Pinkerton Place in 2003
I bought my first car when I was in eighth grade in 1996 for $400.00. It was a 1964 1/2 mustang that had a 260 backed by a C4 auto transmission. I had found the car in a Press-Enterprise classified ad posted by a guy in his mid thirties with a few toddlers and in need of some cash. He said that he wanted to restore the car, but started having kids and that prevented him from ever starting the project. The car was essentially a shell that needed everything. The top picture is the car closer to the time that I sold it. You'll notice the 3" cowl induction hood, but cannot really see the Shelby style trunk lid and extensions. I recently found a couple of pictures and ass I find more I'll add them to this post.


1964 1/2 Mustang interior in parents driveway on Jerome St in 2000
As you can see, the car had an off-white interior with the door panels and dash painted blue to match the outside of the car. I'm going to paint my current Mustang to look much like this first car that I restored.


1964 1/2 Mustang interior w/ white gauges in parents driveway on Jerome in 2000
Notice the sweeping gauges found in most 1965 Mustangs. My gauges were used to scan in order for my old friend Kyle and his dad to create white faced gauge stickers. As you can see they gave me a set for my car. I just had to use the ghetto pedals from the local import race car store since I was a teenager and didn't know better.


Me cleaning my 1964 1/2 Mustang  in parents driveway on Jerome in 2000
This is when my car was freshly completed and it still had the glasspack exhaust that came out of the back of the car. I later changed it over to 2-chamber Flomasters with cutouts to run open headers when I felt like it.


Foreground- Calvin's 1966 with 6-cylinder
Background- Me cleaning my 1964 1/2 Mustang
Back-Background- DJ Powell's Chevy pickup


In the foreground is my brothers 1966 Mustang that he was in the process of restoring. He drove it around with a straight six for a while before he started taking it apart and converting it to an eight cylinder car (the same thing I'm doing with mine.)


1964 1/2 Mustang interior in parents driveway on Jerome St
This was the car closer to the time that I had first purchased it. I don't think I have any other pictures of the car pre-restoration. For some reason this is the only one I have ever been able to find.


Friday, February 11, 2011

Odds & Ends


My dad bought a new electronic distributor for my Mustang. It is a Pro Comp distributor and we'll probably install it in the upcoming weeks.

Today I worked on odds and ends with the Mustang while there was a Valentine's Day tanning party at my house. I took off the u-bolts on the rearend since I neglected to paint them before putting them on and they ended up rusting. When I put them back on I also put on washers when I re-installed them.

I also worked on the drive shaft (re-sanded and painted it) and installed it. I updated the previous blog with pictures in order to keep all the updates together.


I also used Simple Green to start cleaning the gauge cluster wires under the dash since you can't tell the difference between a black wire with a green stripe and a green wire with a black stripe. They turned out pretty nice by the time I was done. I then sprayed some Armor All on the wires to help condition the casings.


Sunday, February 6, 2011

Driveline Dream

My dad had the driveline checked and it's said to be in good shape and balanced so we're going to run it in the car. I used one of his air tools to clean off the surface rust, dirt and grease and then used some ether to prep it for a coat of Por-15. We pulled out the universal joints to check the wear on them while I painted the driveline.


It turned out pretty good with the exception of some spots with stubborn grease that caused the paint to fish-eye. I'll have to go over the entire thing with some sand paper, clean it again and put a coat of regular paint on it now. The universal joints had substantial enough wear to warrant changing them. Luckily my dad had two brand new ones from years back that he never used so we'll use those once the driveline has dried. He installed the one of the universal joints on the T-5 conversion yoke so that we can simply put the other half on the driveline and mount it in the car.


While I was over I went ahead and adjusted the clutch cable and mounted it to the throwout arm. There is some pressure on the pressure plate, but according to Mustang Steve, that is a "good thing." I won't know if it is right until the car is running and we can see when the clutch is actually engaged or if it is engaged with the clutch cable mounted the way it is right now.


UPDATE 02-11-2011

Rachel had the "Get Tan For Your Man" party at our house tonight so I went and worked on the Mustang with my dad. We put on the yoke and universal joint and I then sanded and painted the driveline with a "cast iron" paint:


We had to drive down to Kragen to buy u-bolts to mount the driveline to the 3rd member. They sold them individually with lock washers and bolts for $3.99. While I was there I bought some chrome polish for the chrome parts throughout the interior.