Sunday, October 30, 2011

Painting the Jams & Other Parts


This weekend I was busy with a marriage conference at my church among other things so I didn't have a chance to work on the Mustang, but my dad and brother have spent a lot of time getting the car prepped for paint. They even spent the afternoon painting all of the jams and interior so that we can put the car back together for to shoot the exterior all together. They painted underneath the hood as well as the backside of things like the headlight extensions and fender extensions. My brother was kind enough to take some pictures with his very old phone. 
Underside of Hood Painted

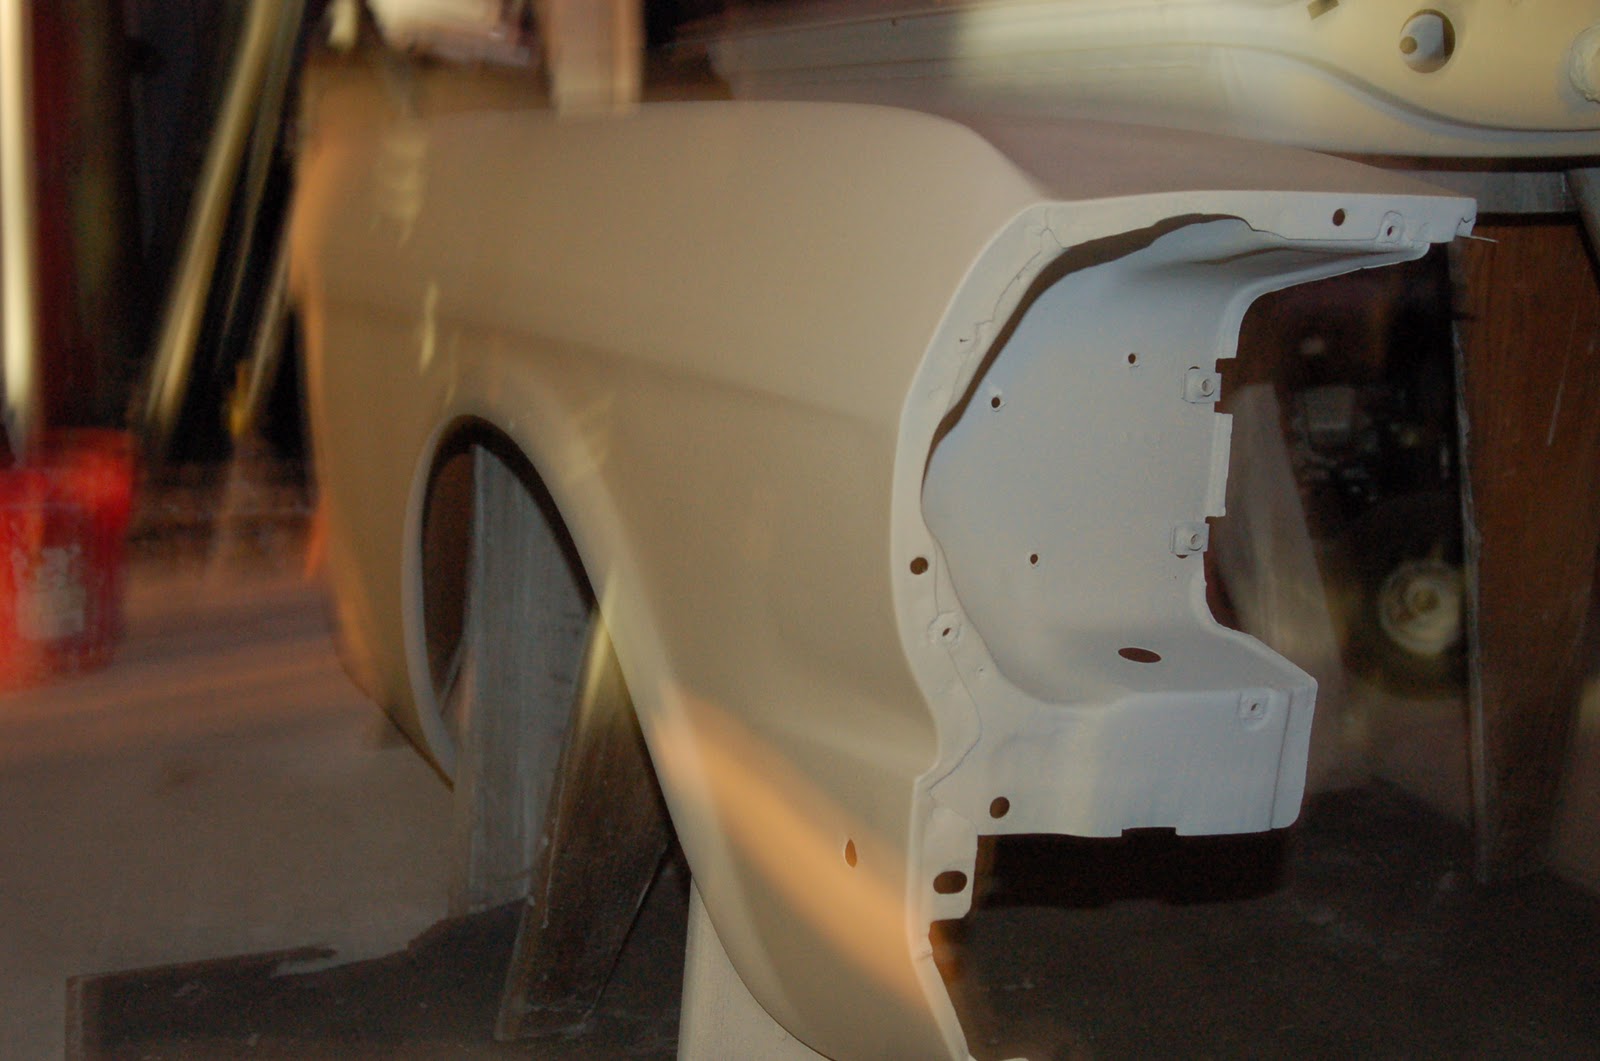
As you can see below, they painted the backside of the rear fender extensions as well as the headlight extensions. They also painted the back of the front valence, stone deflector, the headlight buckets, and the lower grille support.

Here is a shot of the passenger side headlight bucket in the sunlight. It looks great. I'm excited to put it together on the car. 

the door itself was also sprayed the same color as the outside of the car and will have white interior door panels that will lay across it once the interior is purchased and installed.

Since they were painting the area under the rear fender extensions, they went ahead and pulled the paint across the rear tail panel to see how it would lay down. From the picture below, it looks like it laid down pretty well. We'll color sand it in order to shoot a fresh coat across the top to blend it with the rest of the car when we shoot the two stage with pearl.


Wednesday, October 26, 2011

Sanding the 4th Coat of Primer

Part I

I spent a good five hours sanding the Mustang this afternoon/evening along with my brother and my dad. We just about finished sanding everything. The only parts I have left to sand are the front valance,  stone guard and one of the doors. 

I also filled the edges of the trunk lid and the are above the tail light panel with seam sealer. I also used some JB weld to fix the headlight buckets since both sides were broken at the bend. We'll see how well it holds up once they're installed  in the car.


Part II

I went back over the next day (Tuesday) after work to continue sanding the car, but this time I was using 400 grit paper instead of 320 grit. My older brother helped me when I got there and spent a lot of his time working on the roof of the car. As you can see below, it is so smooth that it actually shows a reflection:


Every time my dad has stopped by the chrome shop to pick up my stainless steel windshield molding, they have been closed. When he stopped by today they were actually open so he was able to finally pick the straightened and polished pieces up. They are wrapped up in plastic and I plan on keeping them that way until I put them on the car in a month or so after it's painted and color sanded.


I had my family hard at work wet sanding what I imagine will be the last coat of primer that we shoot on the car. After my brother finished the roof, he moved to the hood.


My dad spent his time focusing on the doors once he got home from a long days work. He's been a big help on the car and has put in way more hours than he needs to so I'm very grateful.


If you recall from previous posts, we've been searching for the old car keys in order to remove the ignition switch and bezel before painting the dash. While I was searching for the door plugs I stumbled across both the keys and the trunk lock which were in a bag labeled "Right Rear Window". Needless to say I was quite pleased and immediately went to work at removing the switch and bezel. It didn't take much effort once you know to turn the key to the Accessories position (counterclockwise) and use a paperclip to release the switch. I found an article on Average Joe's website that helped.


Sunday, October 23, 2011

Fourth Coat of Primer- Feather Fill


I believe yesterday marked the fourth and final full coat of primer that the Mustang will see before paint. The car was pretty well sanded before I arrived to work on it Saturday morning, but my older brother and I did spend a couple of hours going back over it to find spots that needed a little more attention and also prepping it to receive another coat. This time we opened up the car cover the usually houses my mom's Cadillac CTS and set it up to hold the fenders, trunk lid and all of the other odd and end parts. I also spent the first part of the morning filling the drip rail seams and door jam seams with seam sealer.

Drip Rail Seam Before

Drip Rail Seam Sealed

Drip Rail Seam Sealed and Primered

Door Jam Sealed


I had to start cleaning up to leave by 1pm and to boot I had to change my wife's oil and rotate her tires in between prepping the car for primer. I'll save you the anxiety and just tell you now that I was able to get it all done in between the hours of 9am-1pm. We shot everything on the car including the interior and it came out looking fantastic.


The next step will be to wet sand the entire car to get it ready for paint. We bought a two stage Seaside Blue Metallic that will be shot on the car, but also have about 1/2 a gallon of single stage Seaside Blue Metallic that we will probably shoot the interior with as well as the jams before putting the car back together. Once it's together, we can shoot the entire outside of the car at one time. The process will go a little more smoothly if we do things that way. Once it's painted we'll wait for the paint to cure and then proceed to color sand and polish the car before installing the headliner and front/rear glass. Everything else will follow after that. Stainless trim, door handles, sound deadener, gauges, etc etc.

Tuesday, October 18, 2011

Sanding the 3rd Coat of Primer- Part I

I spent my afternoon from 2:45-6:15 sanding the layer of Featherfill that we sprayed on the car last night with the help of my older brother and we still only got about 1/2 way done with the car.


The primer that we sprayed is as tough as nails! But I've got to say, this stuff looks amazing on the car once its sanded. I'm quite impressed. My dad is going to pick up another gallon of it and thin it out a little bit since the first run was straight primer with the added hardener. I think one more coat will make the finish that much better. So far we've blocked both doors, the passenger fender, trunk lid, rear tail panel passenger quarter and half of the roof. We've still got to sand the rest of the roof, the driver's side quarter and the hood. I'm hoping to sneak in another 1 1/2 hours on Thursday before my double header softball game so that my 1/2 day Saturday will be more productive and hopefully include spraying another coat of primer.


Monday, October 17, 2011

Third Coat of Primer- Feather Fill

I was finally able to get a coat of Feather Fill G2 on the Mustang tonight. I started the after noon off by doing some more body work on the top of the trunk lid as well as on the roof. I figured that I might as well give it a shot if I ever want to learn. Its the times when you're uncomfortable that you stretch your limits and learn something new. I must say that the driver's side roof turned out pretty darn good. Of course I didn't get any pictures of it, but maybe I'll get some tomorrow. My dad was the one to shoot the Feather Fill high rise primer since he had to tweak the settings as he sprayed. Everything turned out pretty good.

Rear Trunk Lid

Hood

Rear Roof

Front Valance

Drivers Side Fender

Passenger Side Fender

Of course there were other parts we shot, but by the time we were done it was dark and it was becoming more difficult to take pictures that weren't washed out. The primer requires 4-6 hours of dry time before sanding so I figured that I would leave it until tomorrow before starting to block sand it. My dad was quite impressed with the quality of the primer and will use it on his '67 when it comes time to start the body work. I can already see a couple of areas that need minor body work, but overall the car looks to be in great shape. I'm excited to get it blocked and ready for a fourth and possibly final coat of primer before paint.

Saturday, October 15, 2011

More Body Work...

If I'm being honest, body work sucks. Depending on the shape of the body, it can be the most time consuming part of any restoration. Unfortunately for me the body wasn't in very good shape and I'm spending a lot of time trying to get it ready for paint this month. I had from about 10-2:45 today to work on the Mustang so I took advantage of the opportunity. I was kind of all over the place with body work since there aren't a lot of major sections to work on, but there are a lot of little sections to work on. I didn't do anything with the hood today, but I don't think I had a current picture after I did the last of the body filler work a week ago.


The trunk lid is one of the last major sections that need a lot of attention before paint. The section below was majorly smashed and in need of straightening and body work. I made one big pass with the Evercoat metal body filler and after sanding it with a file sander I saw some low spots so I went over them with the regular pink Bondo. This allowed me to have some contrast between the two so that I could see what I was working with. There are still a few low spots that will need another pass.


Using the Evercoat body filler, I made a a pass along the passenger side rocker panel rail because I found a dent. I used the file sander to go across it and later touched up the bare metal with etching primer.


After blocking out the rear passenger quarter, I found a few low spots as mentioned in my last entry. Today I went over those low spots and did some more blocking. I still need to do a little more blocking before the next coat of primer.


The driver's side rocker panel rail was heavily damaged in the rear and needed to be brought up about a 1/4 inch in one spot so I have been making several passes with the Bondo over the past month or so. Today I went across it with the file sander and it appears to be looking pretty good.


Below is the bottom front of the passenger side fender. It just didn't look right as it rolled down so I skinned it with a coat of Evercoat body filler.


I didn't do much with the roof today because that is my dad's territory. It is just too large of an area for me to work on as a semi-beginner. I did find a couple of low spots that needed to be flushed so I did just that. The front of the roof has a few high spots still so I'm going to let me dad handle those.


I'm hoping to shoot it with its first coat of high build primer on Monday afternoon/evening. We'll see if it works out or not--I'm keeping my fingers crossed. I've got a lot to do in a short amount of visits if I want to paint it before the end of October.

Thursday, October 13, 2011

1" Front Sway Bar Installed

 I had a double header tonight, but stopped off at my parents house to do some body work, sanding and I had my older brother install the new 1" front sway bar. I bought it from CJ's late last week since it was their "Daily Special" for $96.01 with no shipping charges. It's produced by Scott Drake and the bushings are poly urethane.
 
Left- 1" Scott Drake, Right- Stock '66

I had purchased a new front end kit that included new rubber bushings and end links for the stock sway bar which are pictured below. The rubber bushings have been on for about a year and they are already starting to deteriorate.
Stock '66 Mustang Front Sway Bar

1" Sway Bar by Scott Drake

Stock '66 Sway Bar

1" Sway Bar by Scott Drake 

Calvin found that the bushings that mounted between the bottom of the lower control arm and the upper control arm had about 1/2" of free play because the way they were designed. Instead of being slightly tapered, they had a ring that sat about 1/4" above the top of each bushing. Since the two 1/4" pieces faced each other, it seemed to cause a problem. The pieces that went on the ends of the sway bar were identical, but worked perfectly because they sway bar had some thickness to it and the bushings sat inside the sway bar perfectly. The stock rubber bushings did not have the 1/4" part sticking up. I used an air grinder to flatten out the lower bushings for both sides of the sway bar  (4 in all) and they sat perfectly flush without the additional play. Another thing that I found odd was that the stock sway bar end bolts were about twice as thick/heavy as the ones that came with the 1" sway bar. Of course I used the stock end bolts, but still kept the aftermarket ones along with the original sway bar.

As I mentioned, I did some body work and block sanding this afternoon. I sanded more of the body filler along the rocker panel and finally filled a small ding on the top of the passenger side fender. I also blocked the rear passenger quarter panel and found a couple of low spots. Only one really needs to be filled and the others are minor enough to fill with the high build primer. I hope to get some work done on the car on Saturday morning before heading up to see Leslie for her birthday in the mountains.